
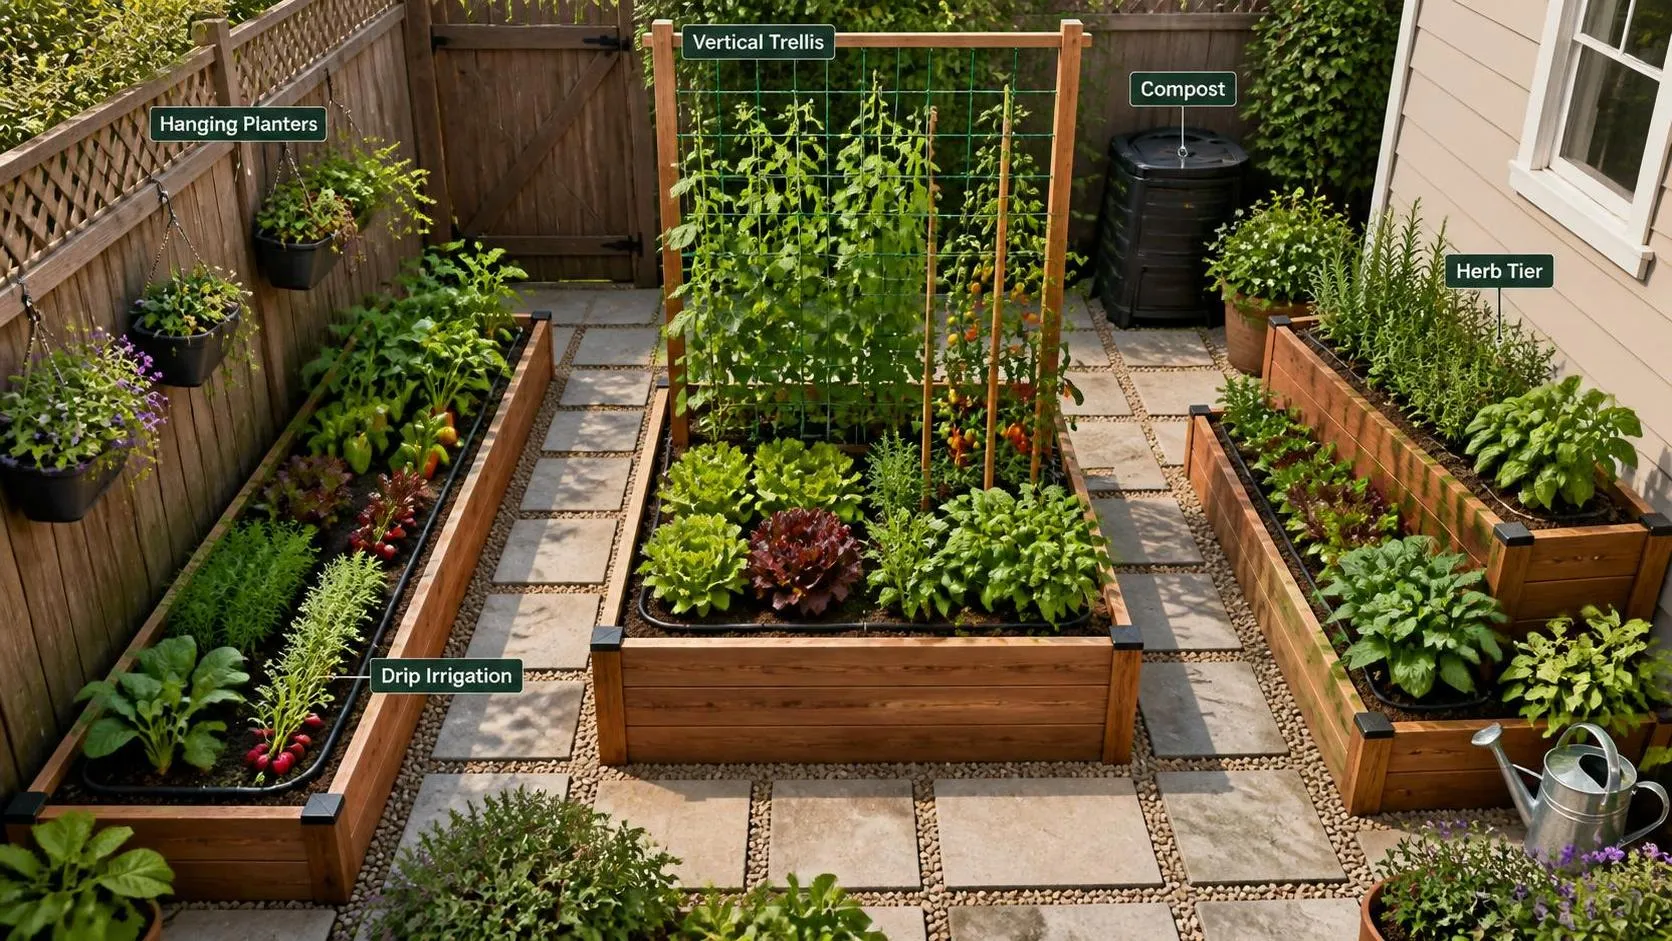
A small backyard is not a gardening problem. It is a gardening focus.
When space is limited, every decision becomes deliberate — which crops earn their square footage, which layout maximizes what the space can do, and which structures make the most productive use of every available centimetre. The result is almost always a more productive and more beautiful garden than a large unfocused plot ever produces.
Raised beds are the tool that makes it possible. Controlled soil, excellent drainage, early warming in spring, and no wasted ground between rows. Here are 10 ideas that work specifically in small backyards where space is genuinely tight.
1. Corner L-Shaped Raised Bed
Difficulty: Medium / 1 Day Est. Cost: $150–$400
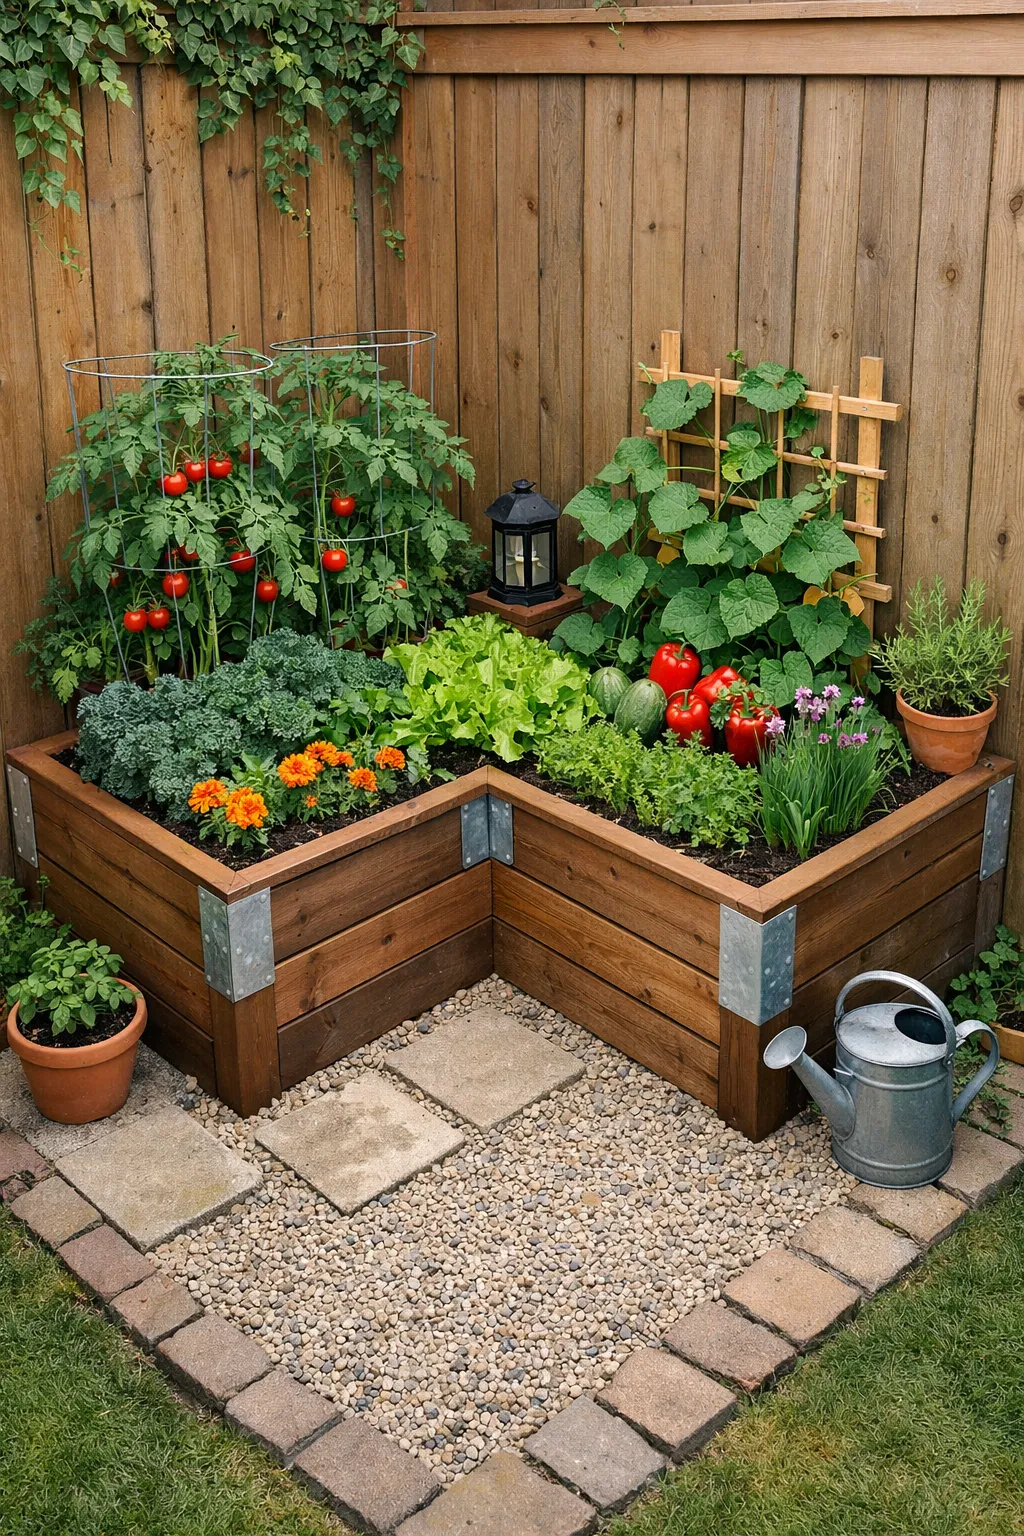
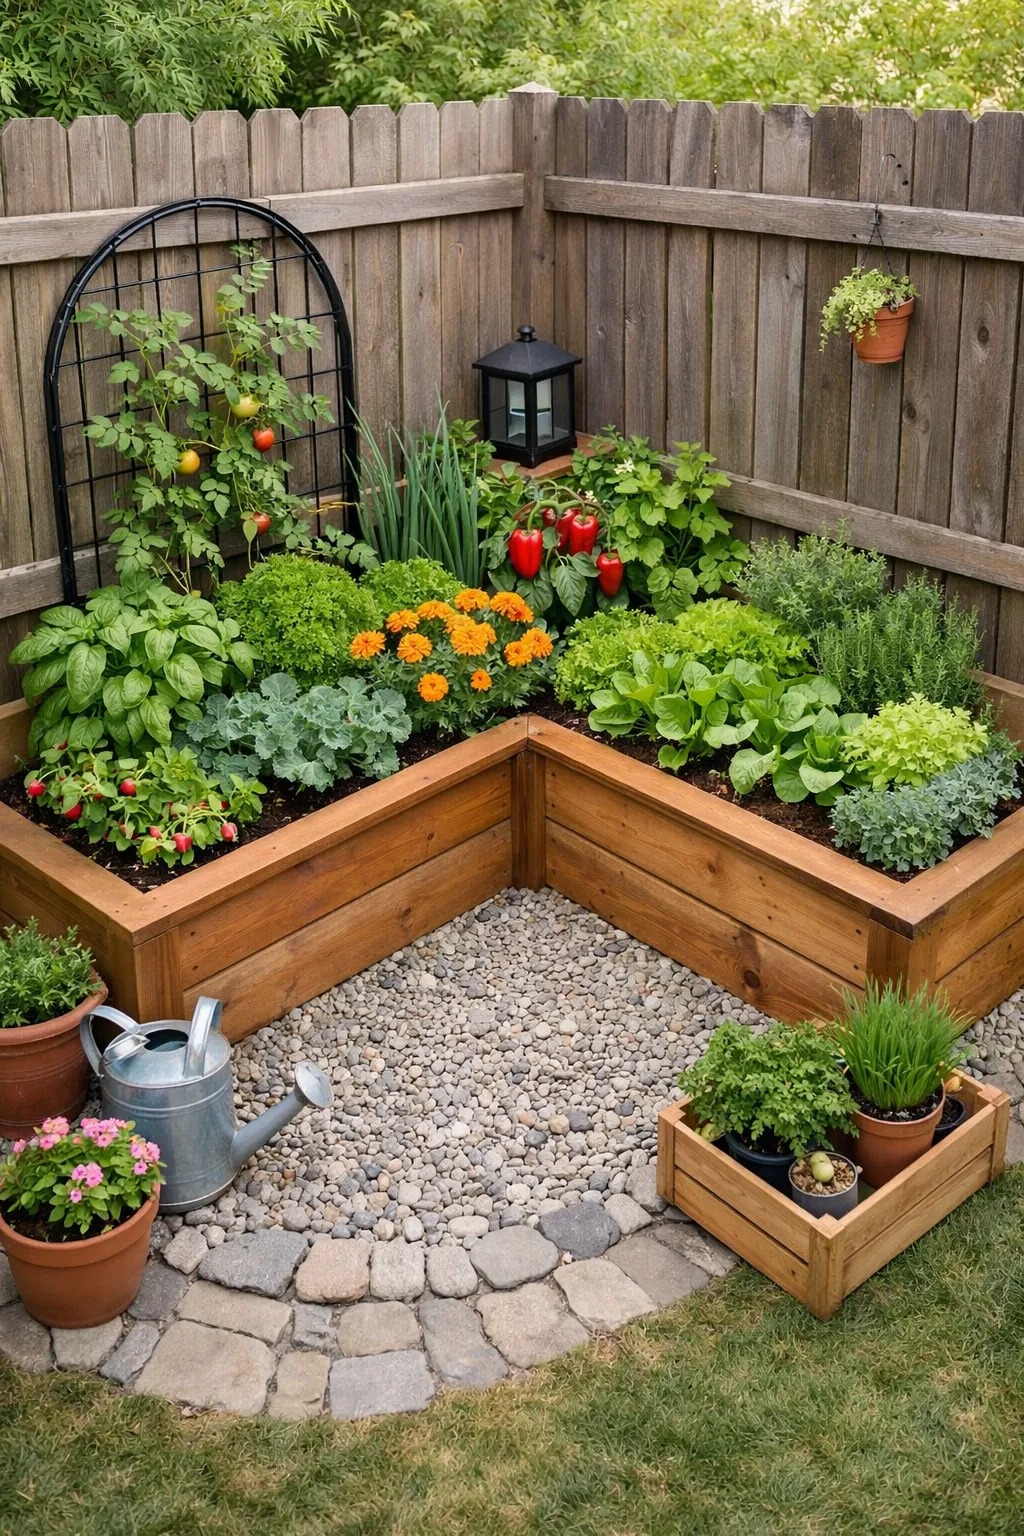
The corner of a small backyard is the most consistently wasted space in urban gardens — two fence lines meeting at an angle where nothing useful ever grows and weeds fill the gap by default. An L-shaped raised bed built directly into that corner turns dead ground into the most productive zone in the garden.
Subscribe to our Newsletter
Get the latest articles and news delivered to your inbox.
Each arm of the L can be dedicated to a different crop category — one side running along the back fence for tall climbing crops trained upward against the fence itself, the other side for compact ground-level vegetables and herbs. The inside corner of the L creates a natural path junction giving access to both arms from a single standing position without stepping into either bed.
Build the structure from thick cedar or redwood planks — at least forty millimetres — with galvanised metal corner brackets at every join for structural integrity. The corner section where the two arms meet needs the most reinforcement because the soil pressure converges there from two directions simultaneously.
Install a trellis panel diagonally across the corner point where the two arms meet and train a climbing bean, a cucumber, or a pea up it from the bed below. The corner trellis fills the gap in the L structure productively and creates the most visually interesting focal point in the garden.
Space tip: Make each arm of the L no wider than seventy-five centimetres so the bed center is always reachable from the outer edge without stepping in. Compacted soil inside a raised bed is its single greatest enemy and every design decision should prevent it.
2. Slim Fence-Line Raised Bed with Vertical Trellis
Difficulty: Easy / Half a Day Est. Cost: $100–$280
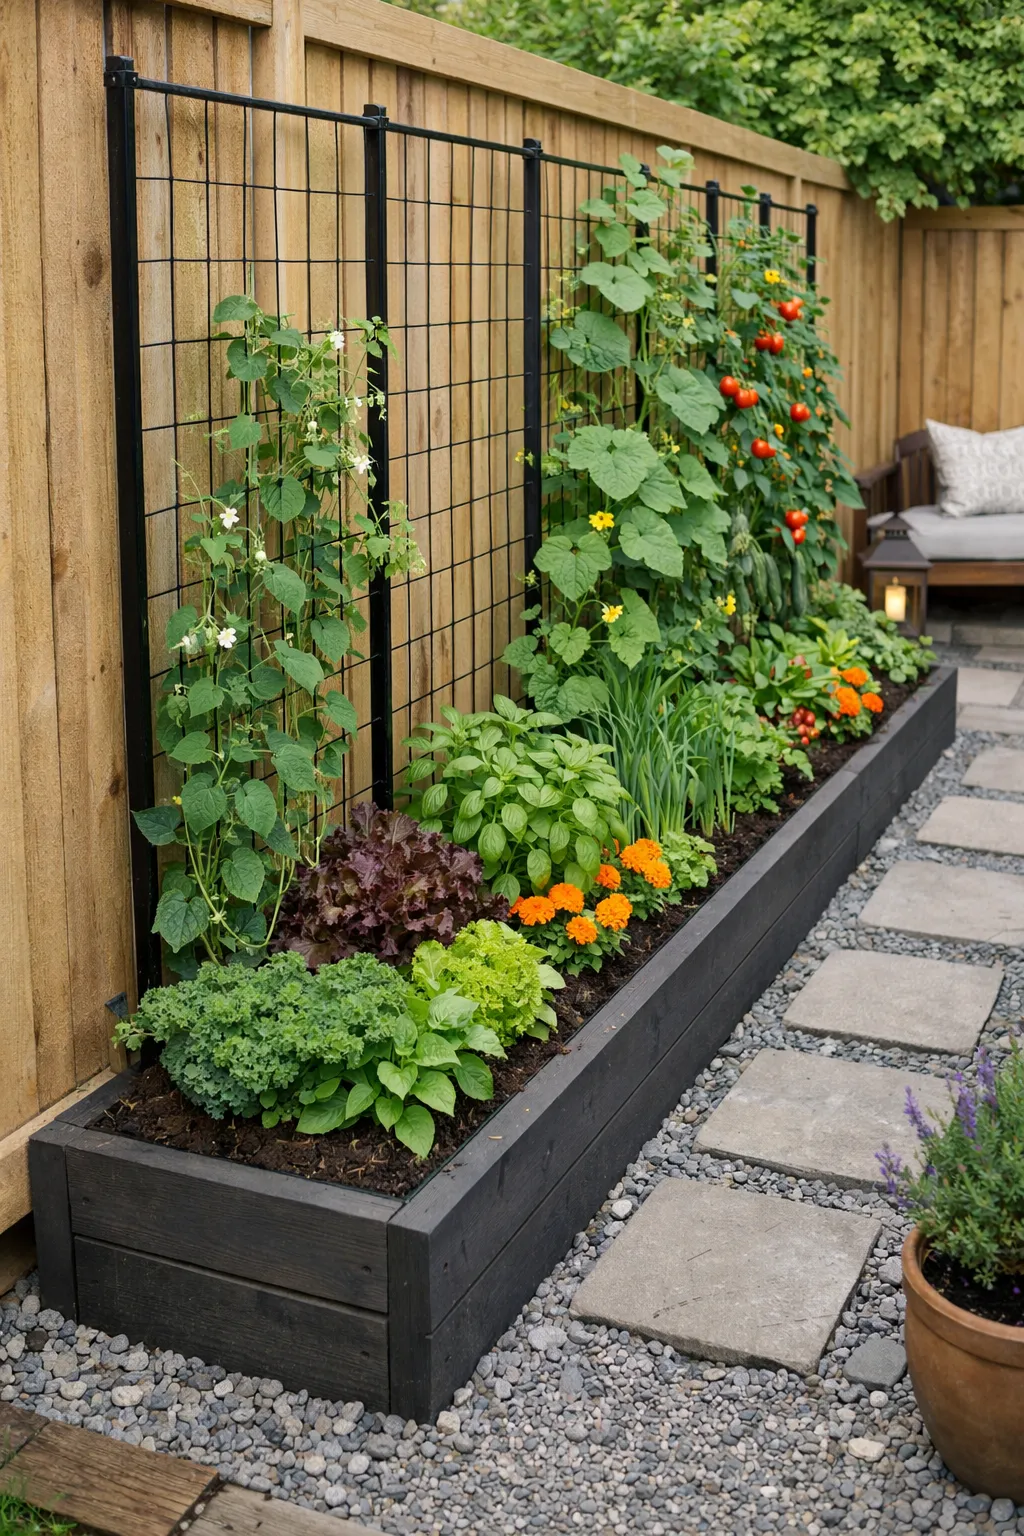
A raised bed running the full length of a garden fence — even if it is only forty centimetres wide — uses boundary space that typically contributes nothing to a small garden. A forty-centimetre bed running five or six metres along a fence provides more growing area than most people realise, and the fence itself doubles the productive capacity of the bed by supporting climbing crops that grow upward into space that ground-level planting cannot use.
Fix a trellis net or a series of galvanised wire horizontal runs to the fence posts before the bed is filled with soil. The vertical growing surface above the bed is accessible from the front — there is no need to reach through the plants to access the fence — and the climbing crops on the trellis cast minimal shade on the bed below because they grow outward from the fence line as they ascend.
Runner beans, climbing French beans, cucumbers, peas, and indeterminate tomatoes tied loosely to the wires are the most productive choices for this setup. At the base of the trellis, in the narrow bed itself, plant compact ground-level companions — basil beside tomatoes, lettuce beneath beans that shade it from the midday sun, and low herbs filling the front edge of the bed at all times.
Harvest tip: A fence-line bed this narrow is best managed from outside the bed entirely — stand on the path and reach in rather than trying to work from within the bed. Keep the path immediately in front of the bed clear of obstructions so both the tending and the harvesting are straightforward at every stage of the season.
3. Galvanised Stock Tank Raised Beds
Difficulty: Easy / 1–2 Hours per tank Est. Cost: $80–$250 per tank
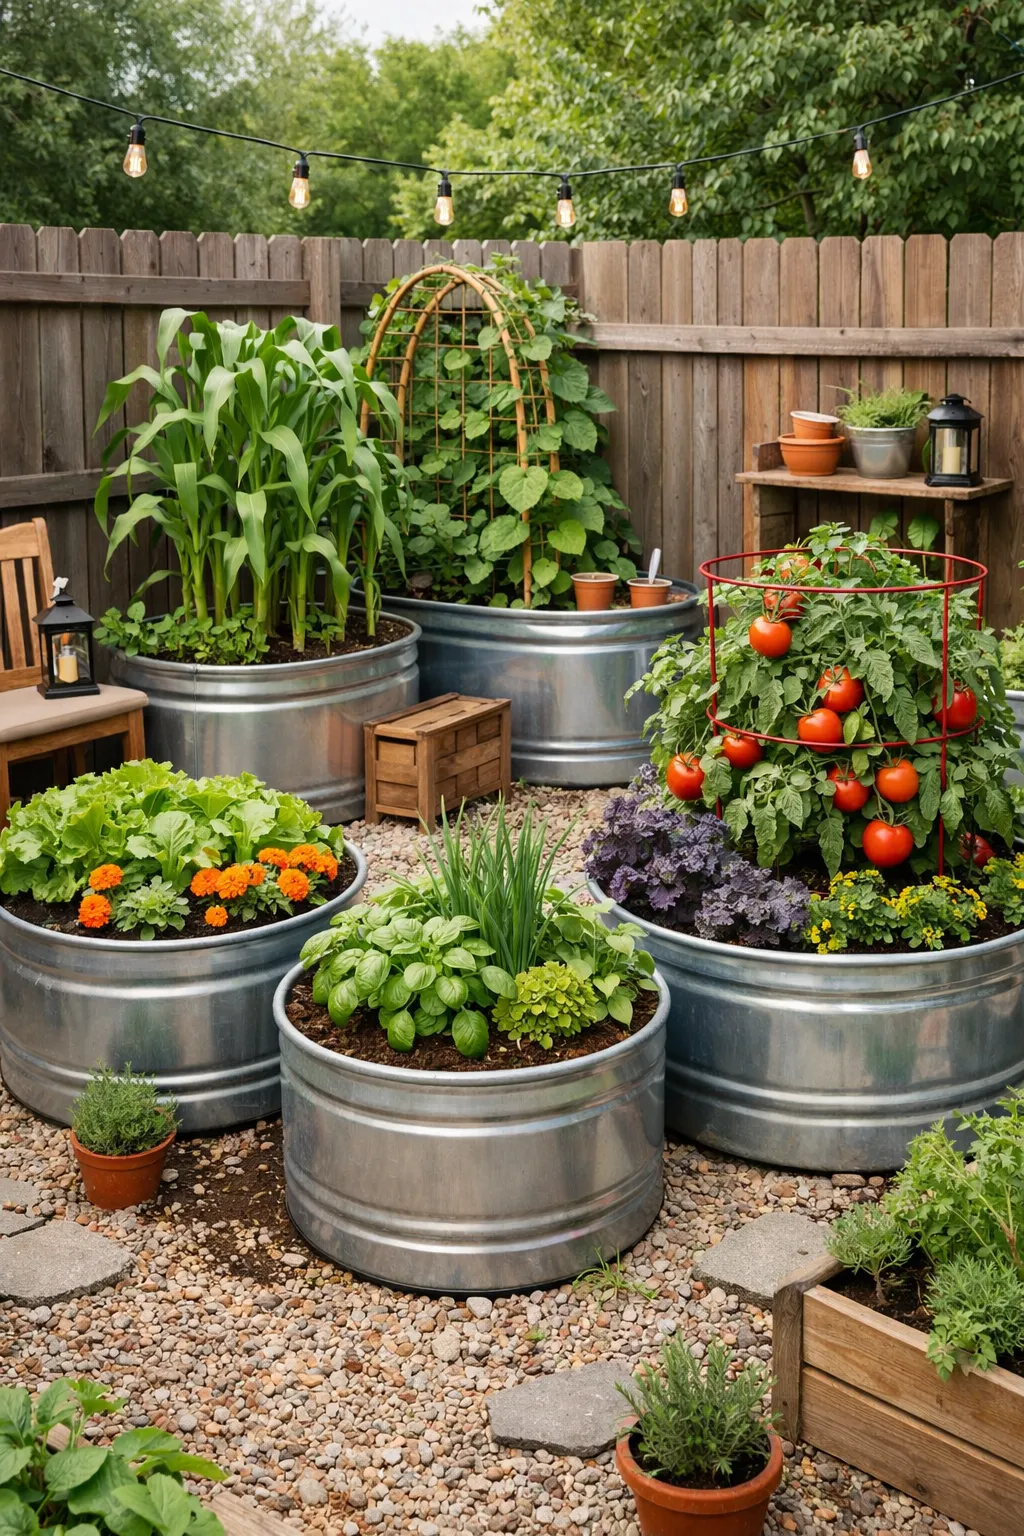
Galvanised metal stock tanks — livestock water troughs repurposed as raised beds — require no construction, no carpentry skill, and no tools beyond a drill and a standard metal bit for making drainage holes. They arrive as complete, structurally sound vessels that are ready to fill and plant within a morning.
The galvanised finish suits contemporary garden aesthetics in a way that timber cannot replicate, and the smooth metal walls are easier to clean between seasons than timber planks that harbour slugs and disease in their grain. The walls warm quickly in spring sunshine and transfer that warmth directly to the growing medium inside, which accelerates germination by one to two weeks compared to beds that take longer to warm.
Drill a minimum of eight evenly spaced holes across the base before filling. Without thorough drainage the base of the tank becomes permanently waterlogged and root rot follows within weeks regardless of how carefully the surface is managed. Fill the bottom third with coarse drainage material — gravel, broken terracotta pieces, or wood chip — before adding the growing medium to reduce the volume of compost required without compromising the drainage function.
Two or three stock tanks of different sizes grouped together on a paved or gravelled small backyard create an instant kitchen garden with a visual quality that purpose-built timber beds take several seasons to develop.
Placement tip: Tanks are heavy when filled and almost impossible to reposition without emptying completely. Decide on the final position before filling and consider the sun path across the backyard through the full day before committing to a location.
4. Three-Tier Staircase Raised Bed
Difficulty: Medium / 1–2 Days Est. Cost: $200–$600
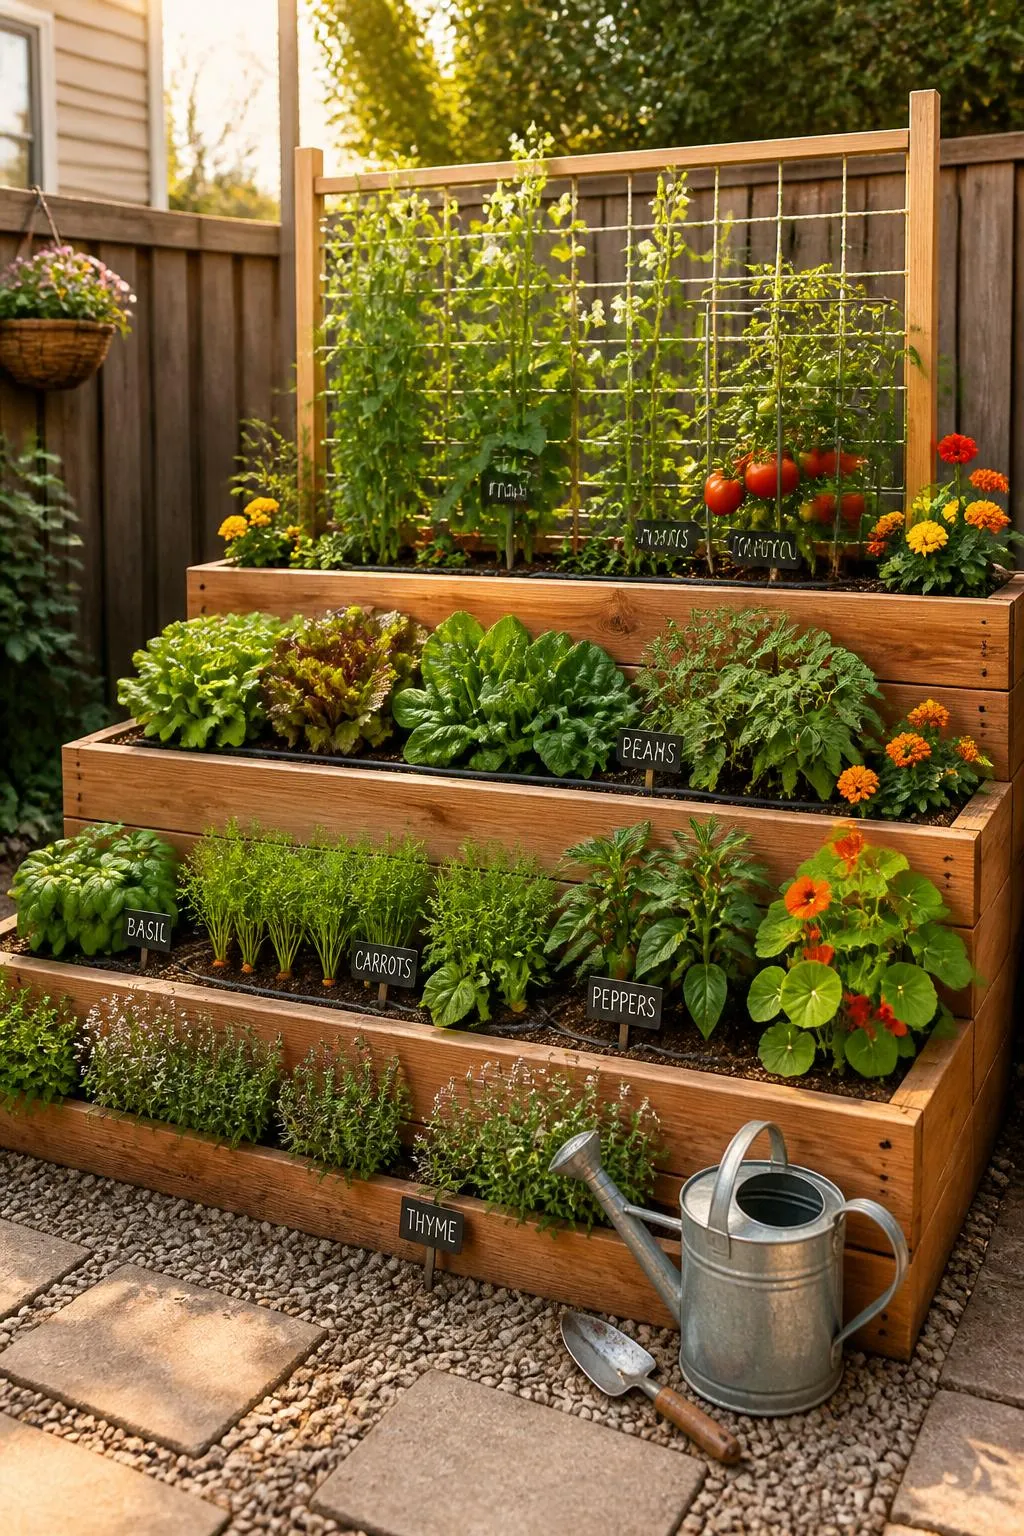
A staircase arrangement of three raised beds ascending from ground level against a fence or wall uses the vertical dimension of a small garden in a way that no single flat bed can match. Each tier sits slightly behind and above the one in front so all three receive unobstructed sunlight simultaneously — the tiers do not shade each other because the stepped arrangement keeps each growing surface in full exposure.
Build the lowest tier widest and deepest for root vegetables that need the most soil volume — carrots, beetroot, and parsnips all perform noticeably better in deeper beds where their roots are not deflected by the container base before reaching full size. The middle tier suits leafy vegetables, compact brassicas, and cut-and-come-again salad crops. The highest and narrowest tier handles herbs, strawberries, and trailing nasturtiums that spill forward over the front edge of the structure.
Use the same material and the same exterior finish across all three tiers so the staircase reads as a single designed feature from every angle. A deep matte charcoal exterior paint on cedar planks is both visually striking and practically sound — the color absorbs solar warmth into the timber walls and the painted finish extends the life of the wood significantly beyond an untreated surface.
Watering note: Water the highest tier first and allow the drainage from it to supplement the moisture in the tier below. This cascade approach reduces the total water needed across all three tiers and ensures the drainage holes in each bed actually drain rather than just running down the outer face of the structure.
5. Square Foot Grid Raised Bed
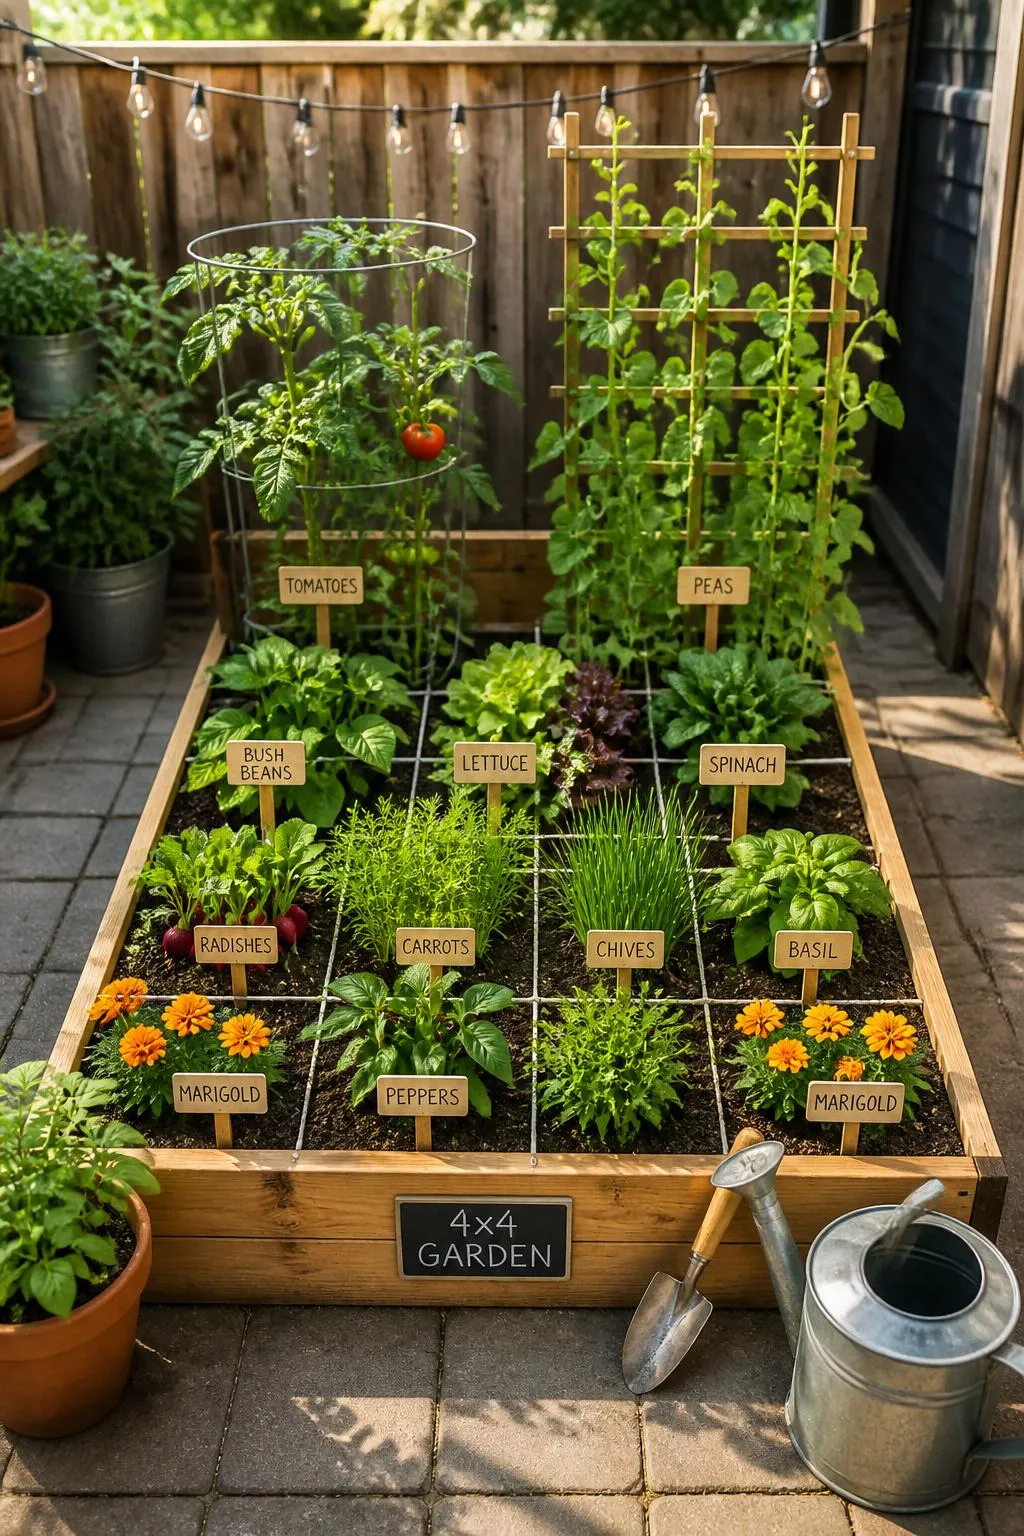
Difficulty: Easy / Half a Day Est. Cost: $80–$200
The square foot gardening method turns a single raised bed into a maximally productive growing system by dividing the surface into a grid of thirty-centimetre squares and assigning a specific crop and planting density to each square based on the mature size of that crop. One tomato plant per square. Four lettuce plants per square. Nine spinach plants per square. Sixteen radishes per square. Every available centimetre of bed surface is used deliberately.
Attach thin timber battens or lengths of string across the top of the bed walls in a grid pattern before planting. The visible grid guides sowing, keeps succession planting organized, and makes crop rotation between squares simple to track season after season. The system forces a discipline that results in significantly higher yields per square metre than conventional row sowing with gaps between rows.
A one-metre by one-and-a-half-metre bed managed on the square foot system typically outproduces a conventional bed two or three times its size in terms of harvest weight per season. In a small backyard where every square metre counts, this multiplication of productive capacity is the most significant advantage the method offers.
The growing medium is the foundation of the system's success. A mix of one-third compost, one-third vermiculite, and one-third peat-free potting mix creates a light, free-draining, nutrient-rich medium that intensive planting requires. Standard garden soil is too heavy and compacts under intensive planting density, reducing the yield advantage the grid system creates.
Rotation tip: Photograph the grid planting layout at the start of each season and keep a simple record of which square held which crop. This record makes rotation planning for the following year straightforward and prevents the build-up of soil-borne pests and diseases that growing the same crop in the same square repeatedly encourages.
6. Raised Herb Spiral
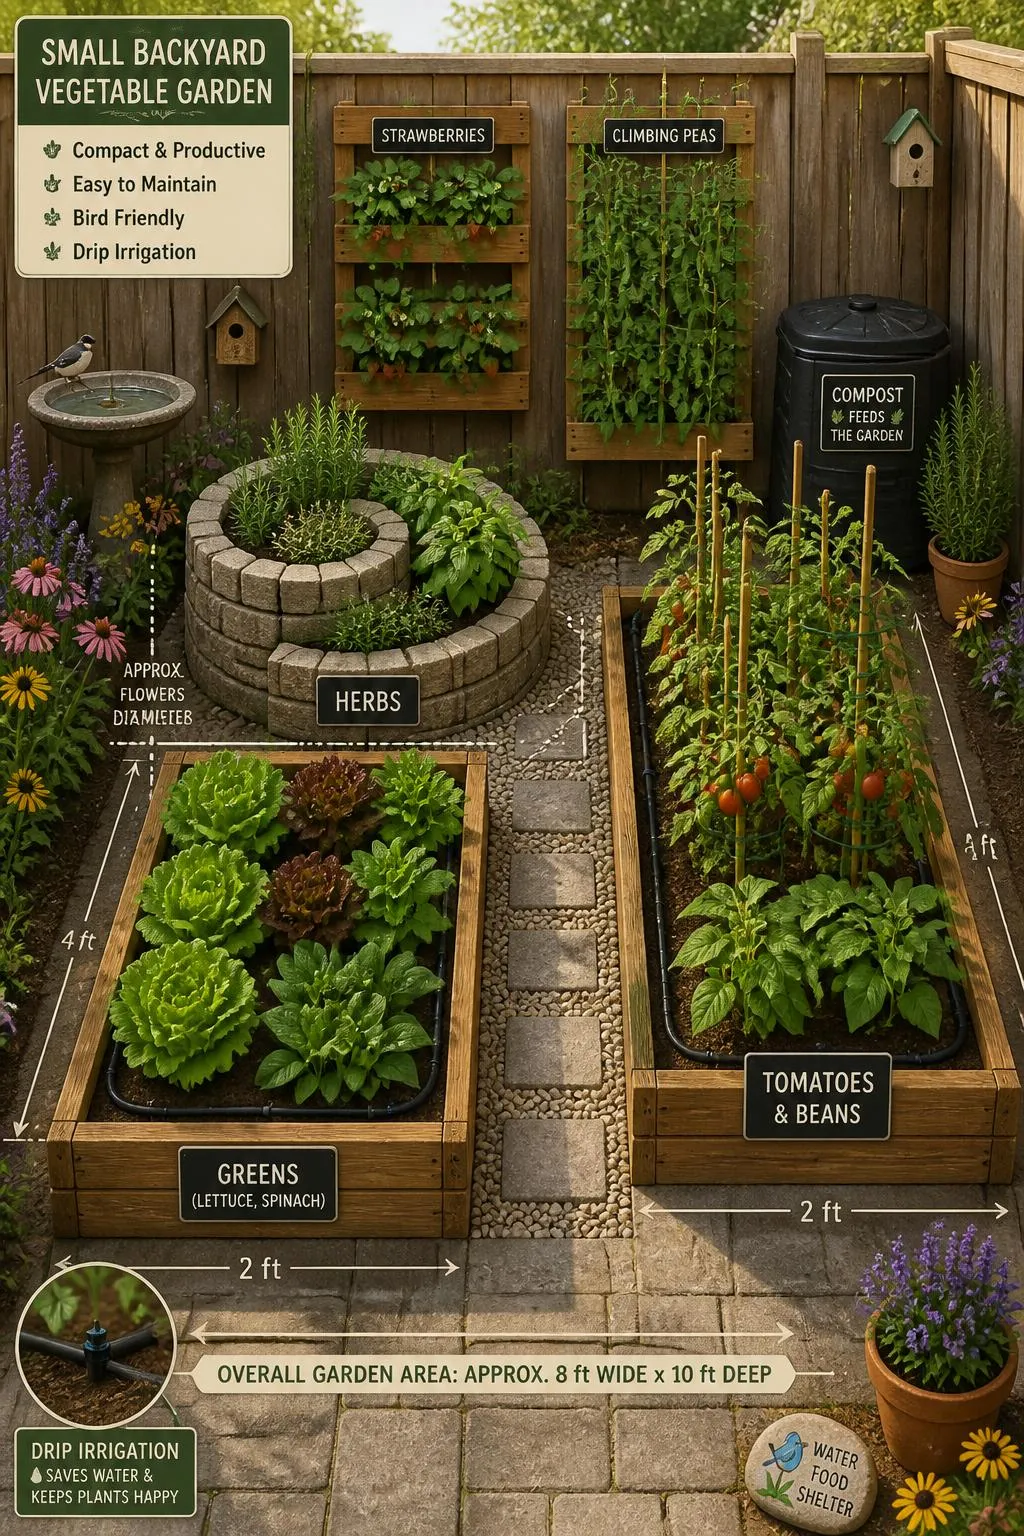
Difficulty: Medium / 1 Day Est. Cost: $100–$300
A herb spiral is a three-dimensional raised bed constructed in a rising spiral form that reaches approximately one metre at its peak from a base of one and a half to two metres in diameter. The spiral creates multiple distinct growing microclimates within a single compact structure — each position on the spiral offers a unique combination of drainage, sun exposure, and moisture retention that suits a different category of herb.
The base of the spiral is moist and partially shaded, providing conditions ideal for moisture-loving herbs — mint, coriander, chervil, and Vietnamese coriander. The middle sections are moderately drained and sunny, suited to parsley, chives, and lemon balm. The highest, most exposed peak is the driest and hottest position on the structure — exactly the conditions that Mediterranean herbs evolved for, making it the home of thyme, rosemary, oregano, and sage.
Build the spiral walls from natural stone, reclaimed brick, or timber rounds and fill each section with a growing medium matched to the herbs it will support — a heavier, moisture-retentive mix at the base and a sharp, gritty, free-draining mix toward the top. The different growing media create genuine habitat variety rather than simply placing all herbs in the same compost at different heights.
The spiral form is also among the most visually compelling features a small garden can include. Its organic shape contrasts with the straight lines of fences and paths and its layered texture — stone or brick, varied foliage, multiple heights — gives it a presence disproportionate to its actual footprint.
Planting tip: Position the tallest point of the spiral on the south side of the structure and orient the opening of the spiral to face south as well. This orientation maximizes sun exposure across every level and keeps the north-facing base in the naturally cooler, shadier conditions that moisture-loving herbs prefer.
7. Keyhole Raised Bed
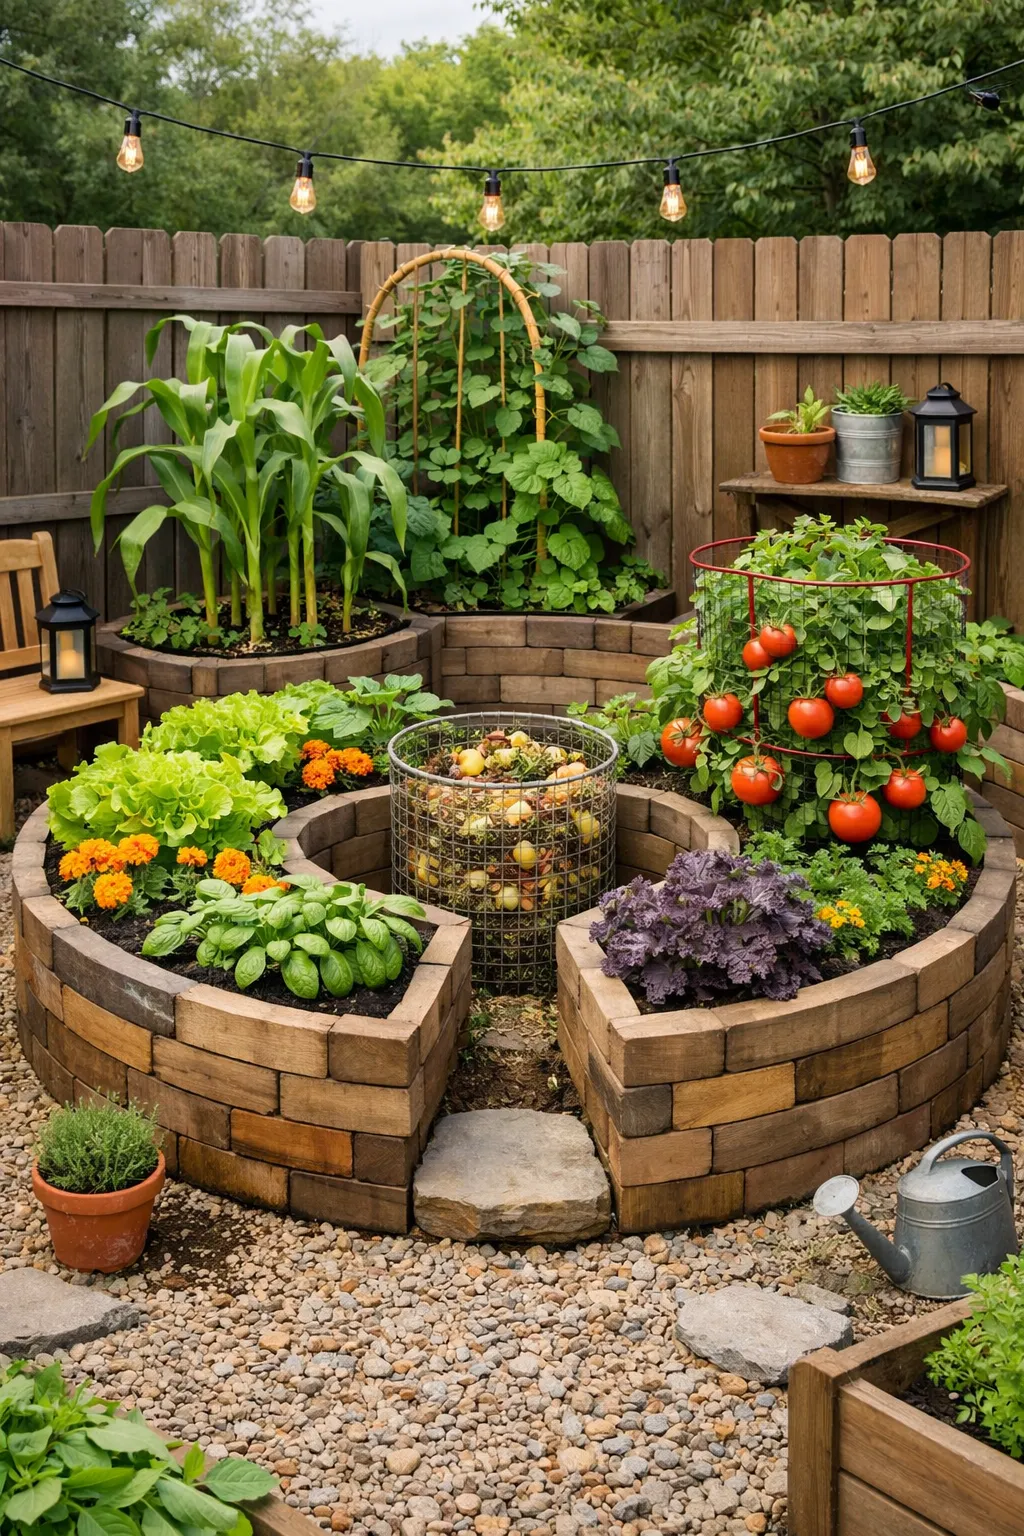
Difficulty: Hard / 1–2 Days Est. Cost: $200–$500
A keyhole bed is a circular raised bed with a narrow entry notch cut into one side — wide enough to step inside — that allows the gardener to reach the center of the bed from an interior position rather than leaning across from the outside. This seemingly small design change makes it possible to build a bed up to two and a half metres in diameter that remains fully accessible without ever stretching uncomfortably.
The productive area of a keyhole bed is significantly greater than a standard rectangular bed of similar footprint because the circular form wastes none of the available area on corners that are difficult to plant densely. A two-metre diameter keyhole bed provides approximately three square metres of growing surface — more than a one-metre by two-metre rectangular bed of the same overall footprint.
Place a central composting tube — a cylinder of wire mesh open at both ends — at the true center of the bed before filling. Organic matter added to this tube through the growing season composts in place and releases nutrients directly into the surrounding growing medium. The nutrients leach outward from the center in a gradient that suits heavy feeders planted close to the tube and lighter feeders toward the outer edge.
The entry notch is best positioned on the north side of the bed so the gardener standing inside the notch faces south and looks outward across the planted area with the sun at their back. This orientation makes the most of the light and provides the clearest view of the entire planted surface during tending.
Access note: Keep the entry notch completely free of planting at all times. A planted notch narrows the access point as growth develops and quickly becomes impassable without damaging the crops on either side. The notch is infrastructure, not growing space.
8. Raised Bed with Cold Frame Lid
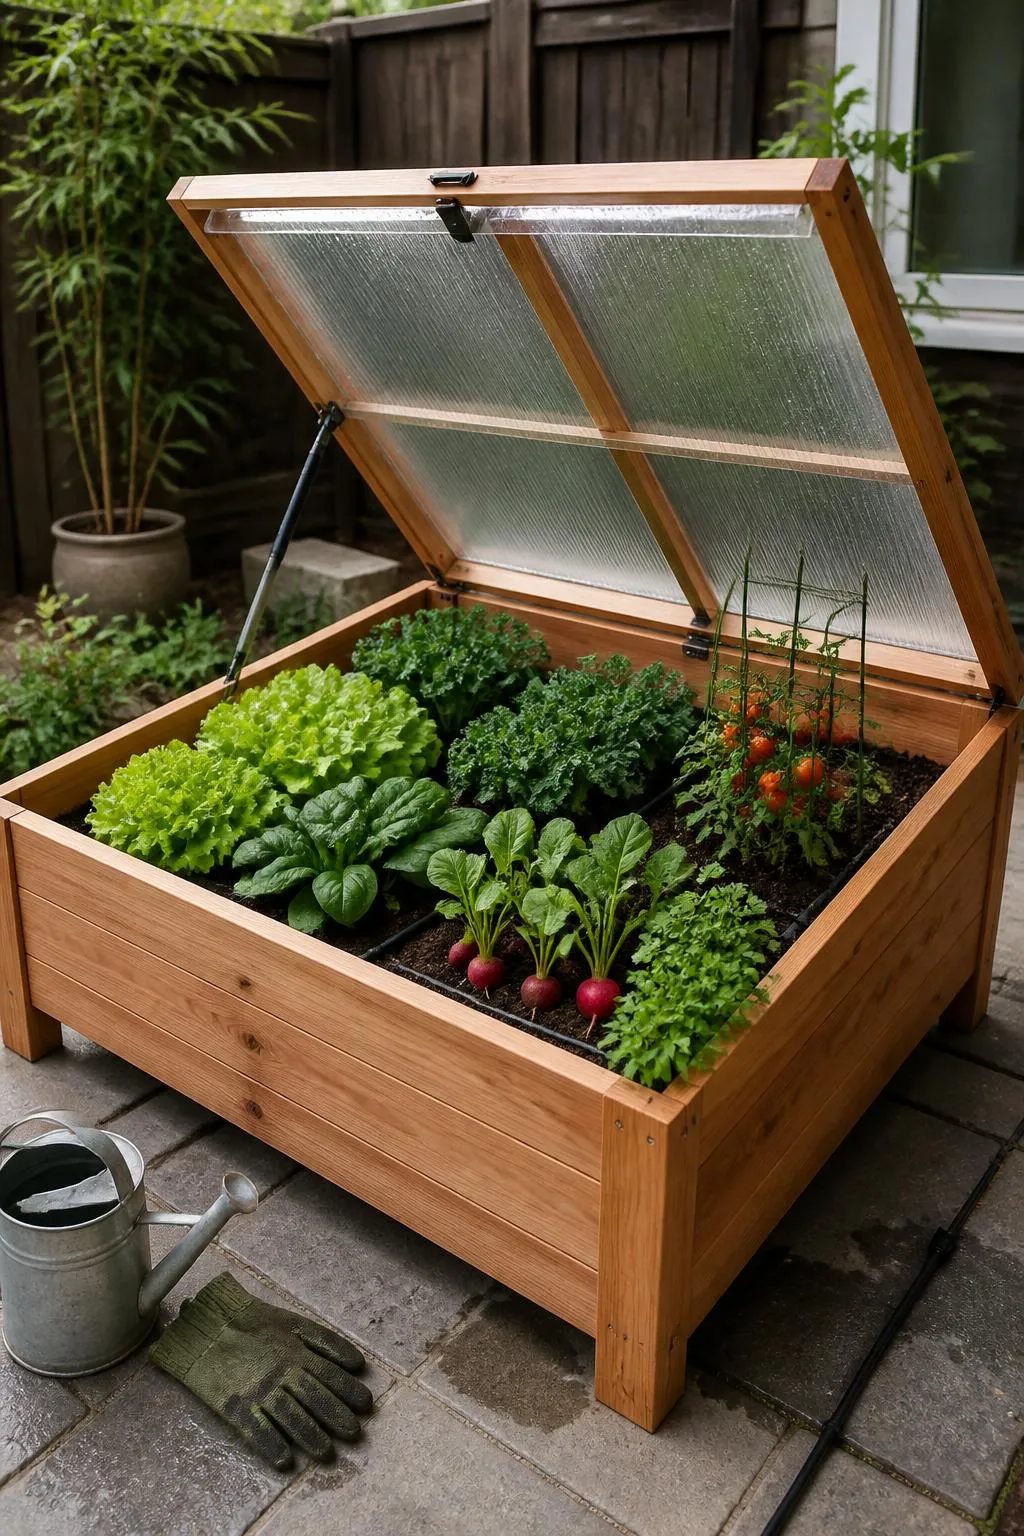
Difficulty: Hard / 2–3 Days Est. Cost: $300–$800
A standard raised bed gains the productive capacity of a greenhouse when a hinged cold frame lid — a timber frame glazed with twin-wall polycarbonate — is built over one end of it. The covered section starts seeds four to six weeks earlier in spring than an open bed allows and extends the harvest of cold-tolerant crops four to six weeks further into autumn, effectively adding eight to twelve weeks of productive growing time to the same physical space.
Build the cold frame section as a natural extension of the raised bed walls — the same height, the same material, the same exterior finish — with the glazed lid hinged at the rear wall and propped open with a simple wooden strut during warm weather. The continuity of materials makes the cold frame look integrated rather than added as an afterthought.
Use ten-millimetre twin-wall polycarbonate rather than glass for the glazing. Polycarbonate transmits ninety percent of available light, retains heat overnight more effectively than glass, weighs significantly less for a lid of the same size, and will not shatter if the lid drops unexpectedly. Fit a simple automatic vent opener — a temperature-sensitive piston device requiring no electricity — so the lid opens automatically when the internal temperature rises above a safe level on warm days and closes again when the temperature drops in the evening.
Season planning tip: In midsummer, remove the polycarbonate panels from the frame and store them flat. The bare timber frame then supports netting for pest protection on brassicas and soft fruit through the months when the cold frame function is not needed. The same structure earns its space in every season by fulfilling a different purpose in each.
9. Companion Planting Raised Bed
Difficulty: Easy / Planning Time Only Est. Cost: $50–$150
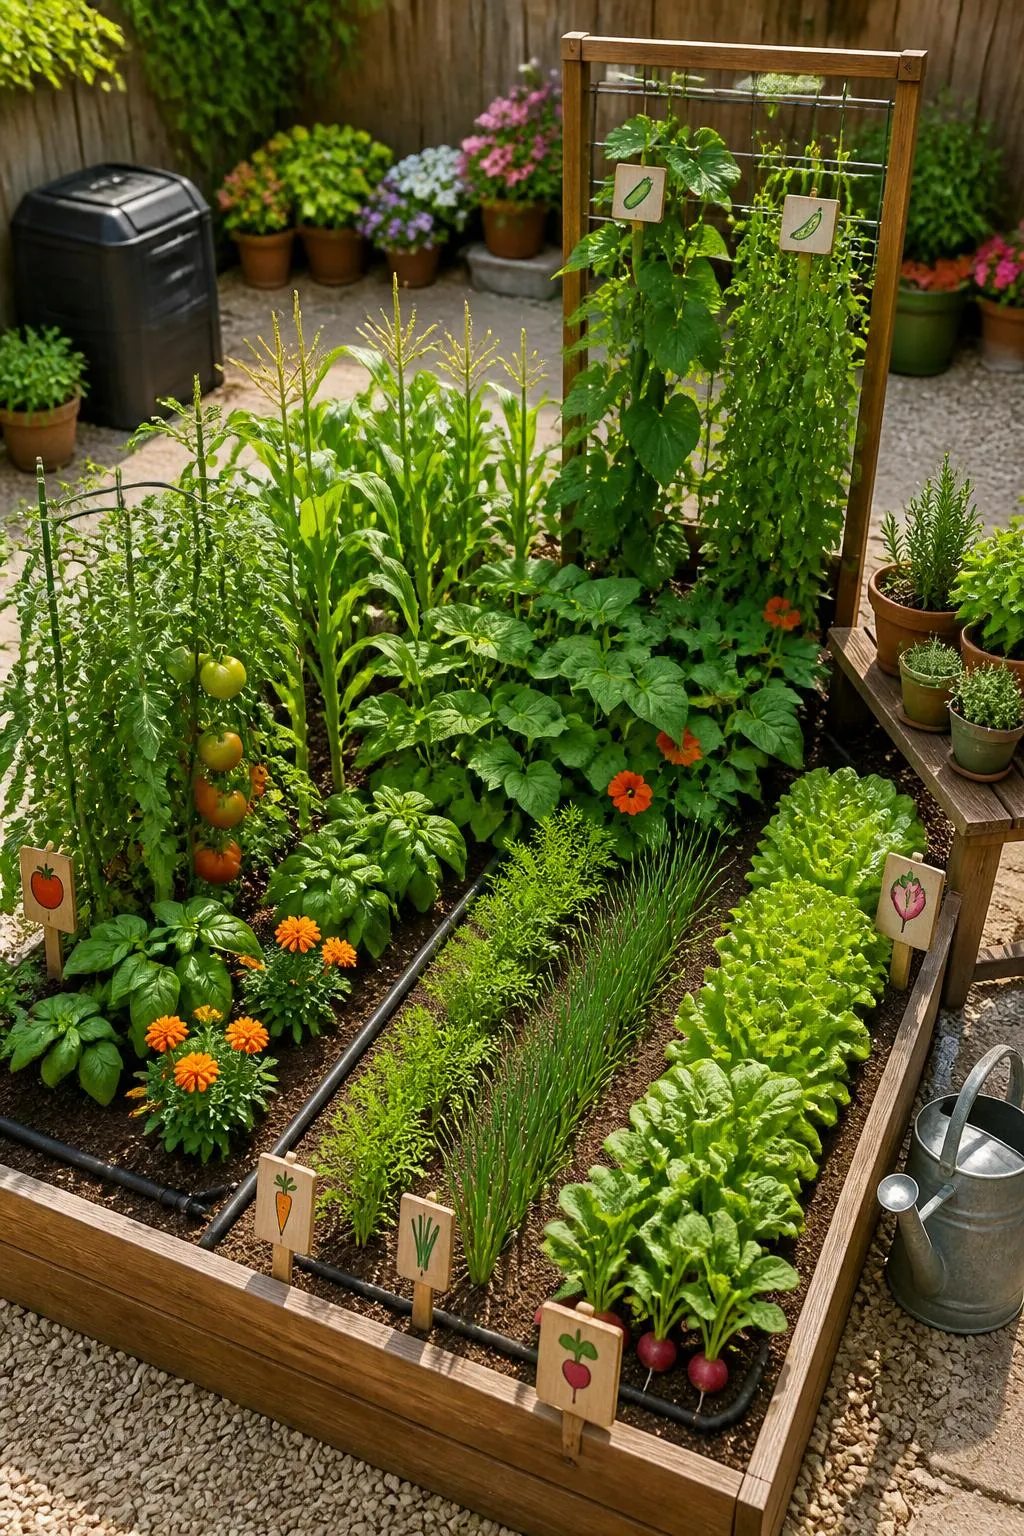
A raised bed planned specifically around companion planting relationships uses limited small-garden space more intelligently than one where crops are arranged by convenience or habit. Companion planting pairs crops that actively support each other within the same bed — suppressing shared pests, attracting beneficial insects, fixing soil nitrogen, or providing physical support — so the interaction between plants increases the total productivity of the bed beyond what either crop achieves alone.
Tomatoes and basil represent the most widely known pairing — basil planted between tomato stems is believed to repel whitefly and thrips while simultaneously improving fruit flavor in the surrounding crop. Marigolds planted at the four corners and along the edges of any bed deter aphids, nematodes, and whitefly through root secretions that affect the surrounding soil chemistry. Climbing beans fix atmospheric nitrogen into the soil through root nodules, directly feeding the heavy-feeding brassicas or leafy greens planted beside them.
Map the companion layout on paper before a single seed goes into the ground. The spatial relationship between companion plants only functions when they are genuinely adjacent — spacing companions at opposite ends of the same bed provides none of the intended mutual benefits. The planning time required is twenty minutes. The productivity benefit compounds across the entire growing season.
Include at least one flowering plant in every companion-planted bed — borage, phacelia, or pot marigold. Flowering companions attract pollinating insects that improve fruit set on beans, courgettes, cucumbers, and tomatoes. The pollination benefit alone can increase fruit yield by thirty to forty percent compared to an identical bed with no flowering plants present.
Observation tip: Keep a simple notebook record of which companion combinations perform best in your specific garden conditions. Companion planting outcomes are genuinely site-specific — a pairing that produces outstanding results in one garden may underperform in another due to differences in soil, microclimate, and local insect populations.
10. Upcycled and Budget Raised Bed
Difficulty: Easy / Half a Day Est. Cost: $0–$80
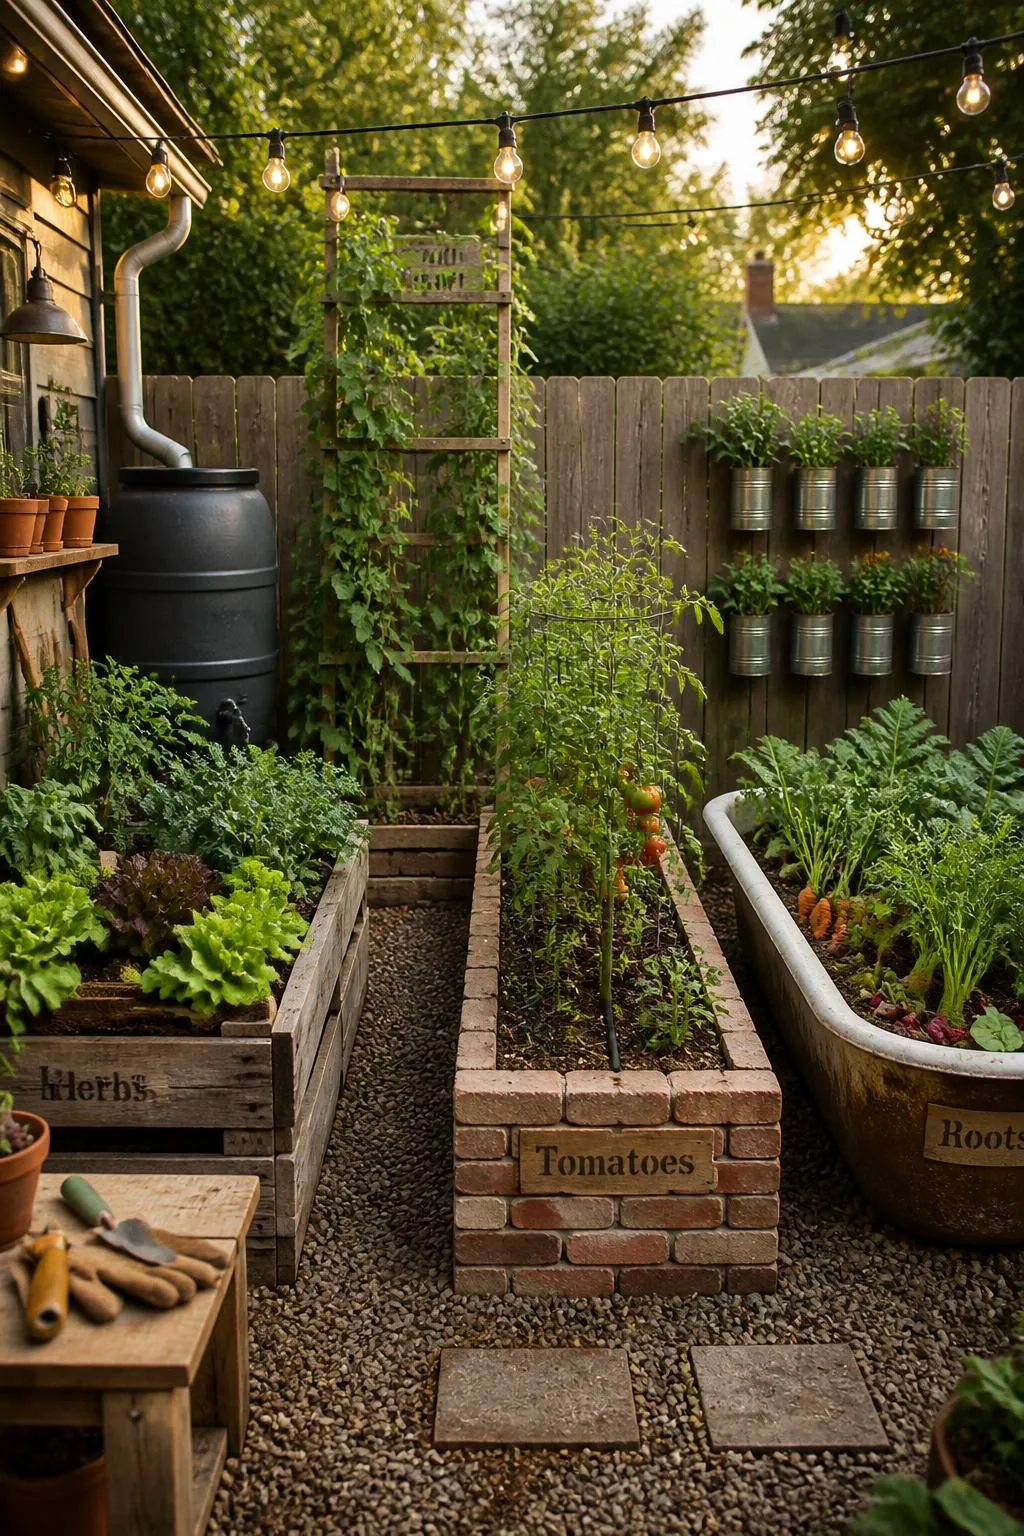
The most sustainable and often most characterful raised beds are those built from materials that already exist rather than from new timber purchased specifically for the purpose. Reclaimed scaffold boards from builders' merchants, railway sleepers from salvage yards, wine barrel halves, old stone troughs, and concrete blocks salvaged from demolition sites all make excellent raised bed walls with a weathered quality that new materials take years to develop.
Scaffold boards are the most consistently available reclaimed timber for raised bed construction — they are typically made from structural grade pine, already weathered to a smooth silver-grey surface, and available in standard lengths that suit most bed dimensions without cutting. A set of six second-hand scaffold boards from a local hire company costs almost nothing and builds a bed that outperforms an equivalent timber kit bought new from a garden centre in both durability and visual character.
The growing medium is where the budget should be directed regardless of how little is spent on the bed walls. A premium peat-free compost with added horticultural grit or perlite produces significantly better results than a basic growing medium in the most expensive raised bed kit available. The crop grows in the soil, not in the timber — invest accordingly.
Begin filling a new budget bed with a generous layer of woody material — branches, logs, cardboard, and straw — at the base before adding compost. This hugelkultur layer decays slowly over several seasons, improving soil structure from below, retaining moisture during dry periods, and releasing nutrients gradually as the wood decomposes. It also reduces the volume of purchased compost needed to fill the bed to the surface, which reduces the initial cost further.
Long-term note: A bed built from reclaimed materials with a hugelkultur base and filled with quality compost will be producing excellent harvests five years from now with no inputs beyond annual top-dressing with homemade compost. The initial investment in good soil biology pays compound returns across every subsequent season.