
No garden, no problem.
An apartment balcony with zero ground space is still a growing space. Sun, air, and a container with decent drainage are the only things a vegetable plant genuinely needs. Everything else — the deep beds, the sprawling rows, the compost heap at the bottom of the garden — is a luxury rather than a requirement.
The balcony gardener learns something the ground gardener rarely does: that plants respond more to how well they are cared for than to how much space they occupy. A single well-managed container of cherry tomatoes on a sunny balcony produces more fruit than a neglected bed three times its size at ground level.
Here are 10 ideas that make an apartment balcony a genuinely productive food garden with no ground space required.
1. Railing Planter Salad Garden
Difficulty: Easy / 1–2 Hours Est. Cost: $40–$100
Subscribe to our Newsletter
Get the latest articles and news delivered to your inbox.
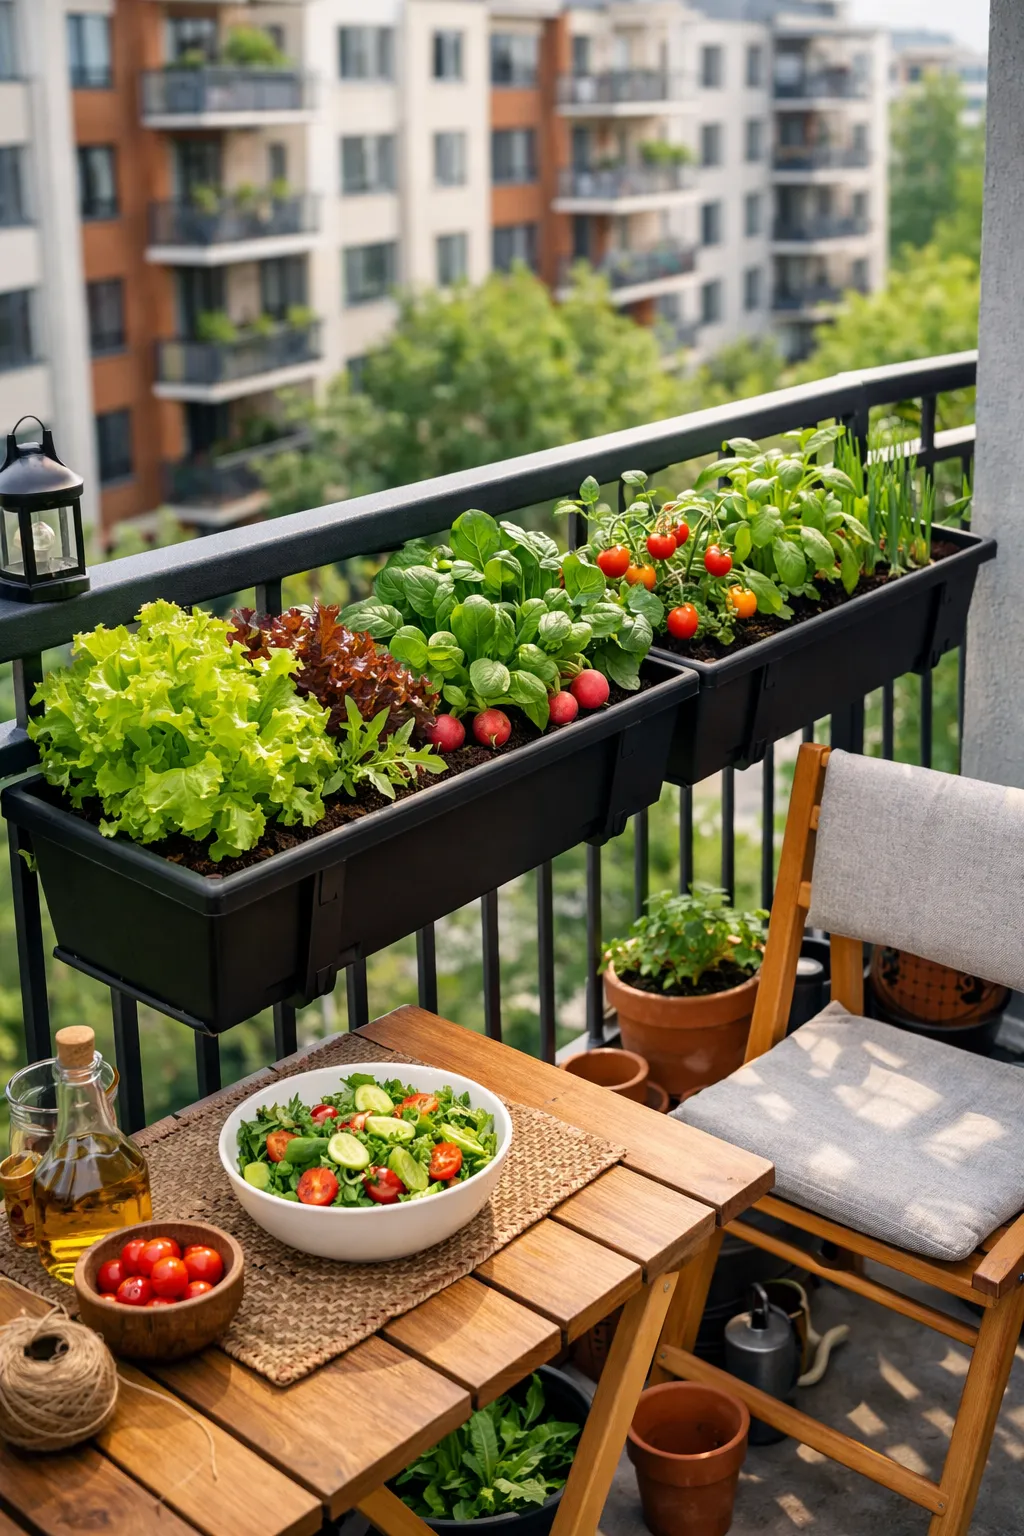
Railing planter boxes that hook or clip onto the balcony railing grow an entire salad garden in space that previously contributed nothing to the household food supply. Each box hangs from the railing without drilling, without adhesive, and without leaving any mark when removed — the bracket simply grips the railing top and the box's weight keeps it stable.
Dedicate each box to a single crop type rather than mixing several species together. One box of cut-and-come-again lettuce mix, one of rocket and mizuna, one of spinach and baby kale, and one of radishes and spring onions gives a rotating harvest across four boxes that takes up no floor space whatsoever. Sow a new box every three weeks through spring and summer so there is always a box at peak harvest while the newest sowing establishes.
Choose a growing medium specifically formulated for containers — a peat-free mix with added perlite or vermiculite that drains freely and does not compact under repeated watering. Standard garden soil becomes dense and waterlogged in a railing box within a single season and dramatically reduces yield.
Water railing boxes daily in warm weather. Their small volume and exposed position mean they dry out significantly faster than floor-level containers, and salad crops that experience water stress even briefly bolt to seed and become bitter and unusable before they reach a usable size.
Variety tip: Choose cut-and-come-again varieties specifically rather than hearting lettuce types. Cut-and-come-again crops regrow after every harvest and provide three to four cuts from a single sowing before they need replacing. Hearting types produce one harvest and are finished, which makes them a poor return on the limited space of a railing box.
2. Vertical Tower Planter for Strawberries and Herbs
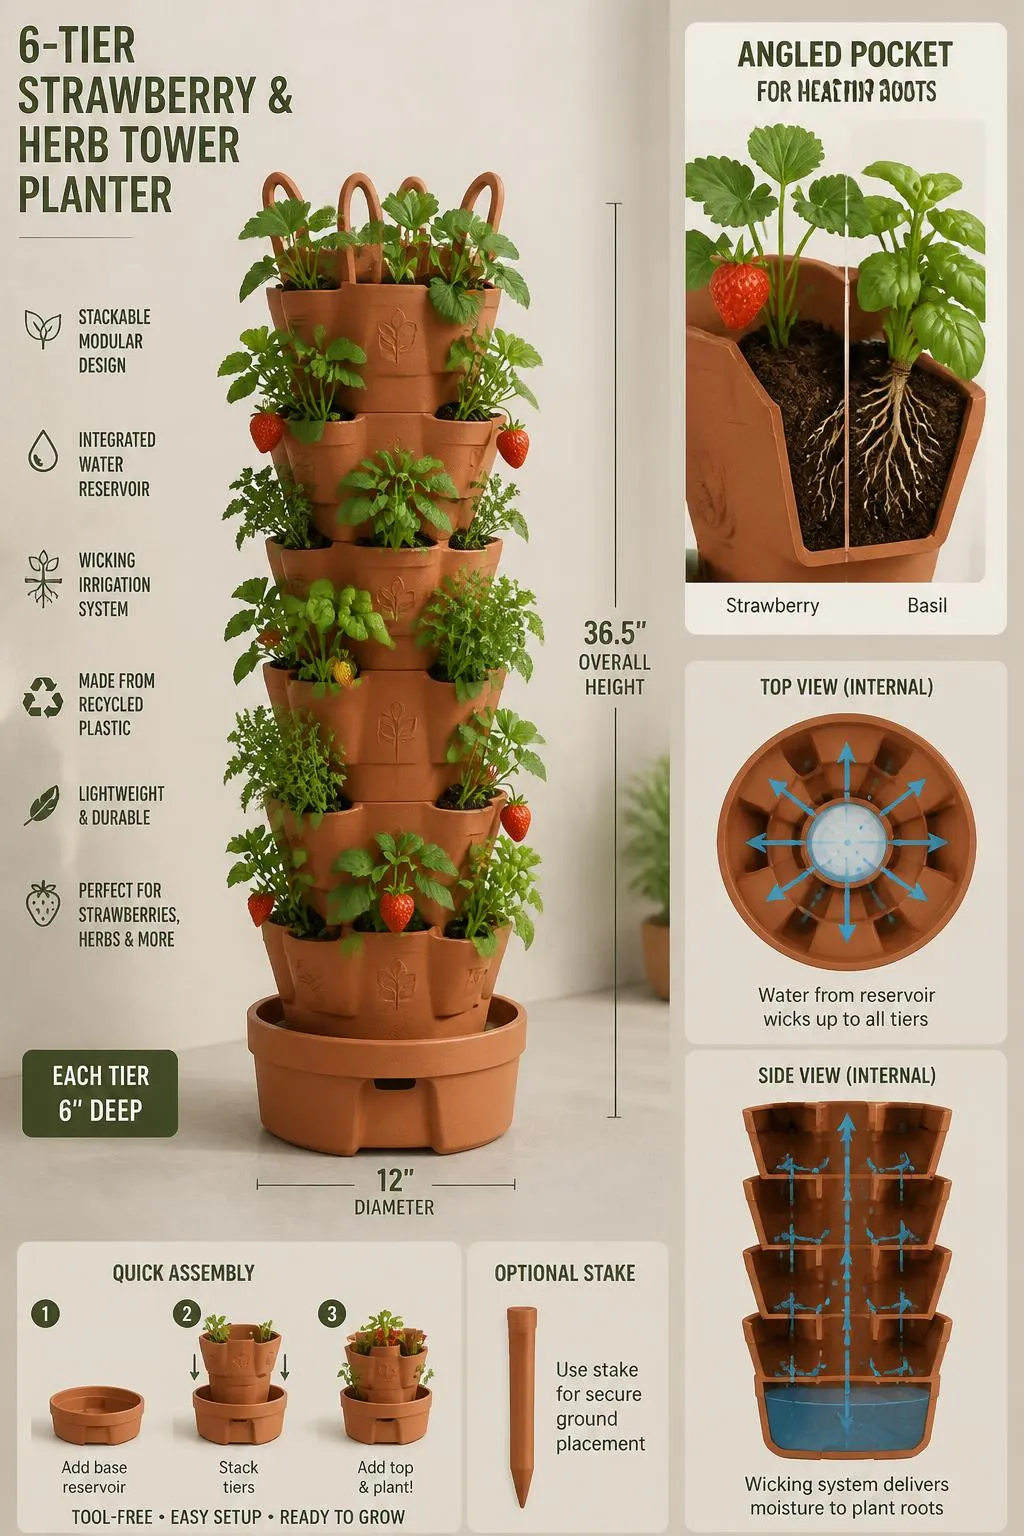
Difficulty: Easy / 30 Minutes Est. Cost: $25–$60
A stackable vertical tower planter — a column of stacked felt or plastic pockets rising to a metre or more from a single base — grows strawberries, herbs, and compact edible flowers from a footprint no larger than a single plant pot. Each pocket holds one plant, and a standard tower of eight to ten pockets produces more than a generous window box arrangement from a fraction of the floor area.
Position the tower in the sunniest spot on the balcony and rotate it a quarter turn every three to four days so every pocket receives equal light exposure. Pockets on the permanently shaded side of a static tower produce smaller, less flavourful fruit and weaker herb growth than those in full sun — the rotation is the management step that makes the difference between a productive tower and a disappointing one.
Plant the uppermost pockets with the most vigorous species — a basil plant, a single determinate cherry tomato, or a well-established strawberry with established runners — so the strongest growers occupy the position with the most direct sun. Fill the lower pockets with compact herbs that perform well in slightly lower light: thyme, chives, and oregano all tolerate partial shade better than basil or strawberries and will still produce useful harvests from a less favoured position.
Water from the top and allow the water to travel downward through each successive pocket. In hot weather felt towers dry out quickly — a single drip emitter inserted into the top pocket on a basic timer provides consistent moisture to the entire column without requiring twice-daily manual watering on the hottest summer days.
Harvest note: Pick strawberries and cut herbs regularly rather than allowing the plants to mature fully between harvests. Frequent harvesting stimulates the plant to produce continuously rather than directing energy toward seed production, which would end the productive period of that plant far earlier than regular picking allows.
3. Deep Window Box Vegetable Bed
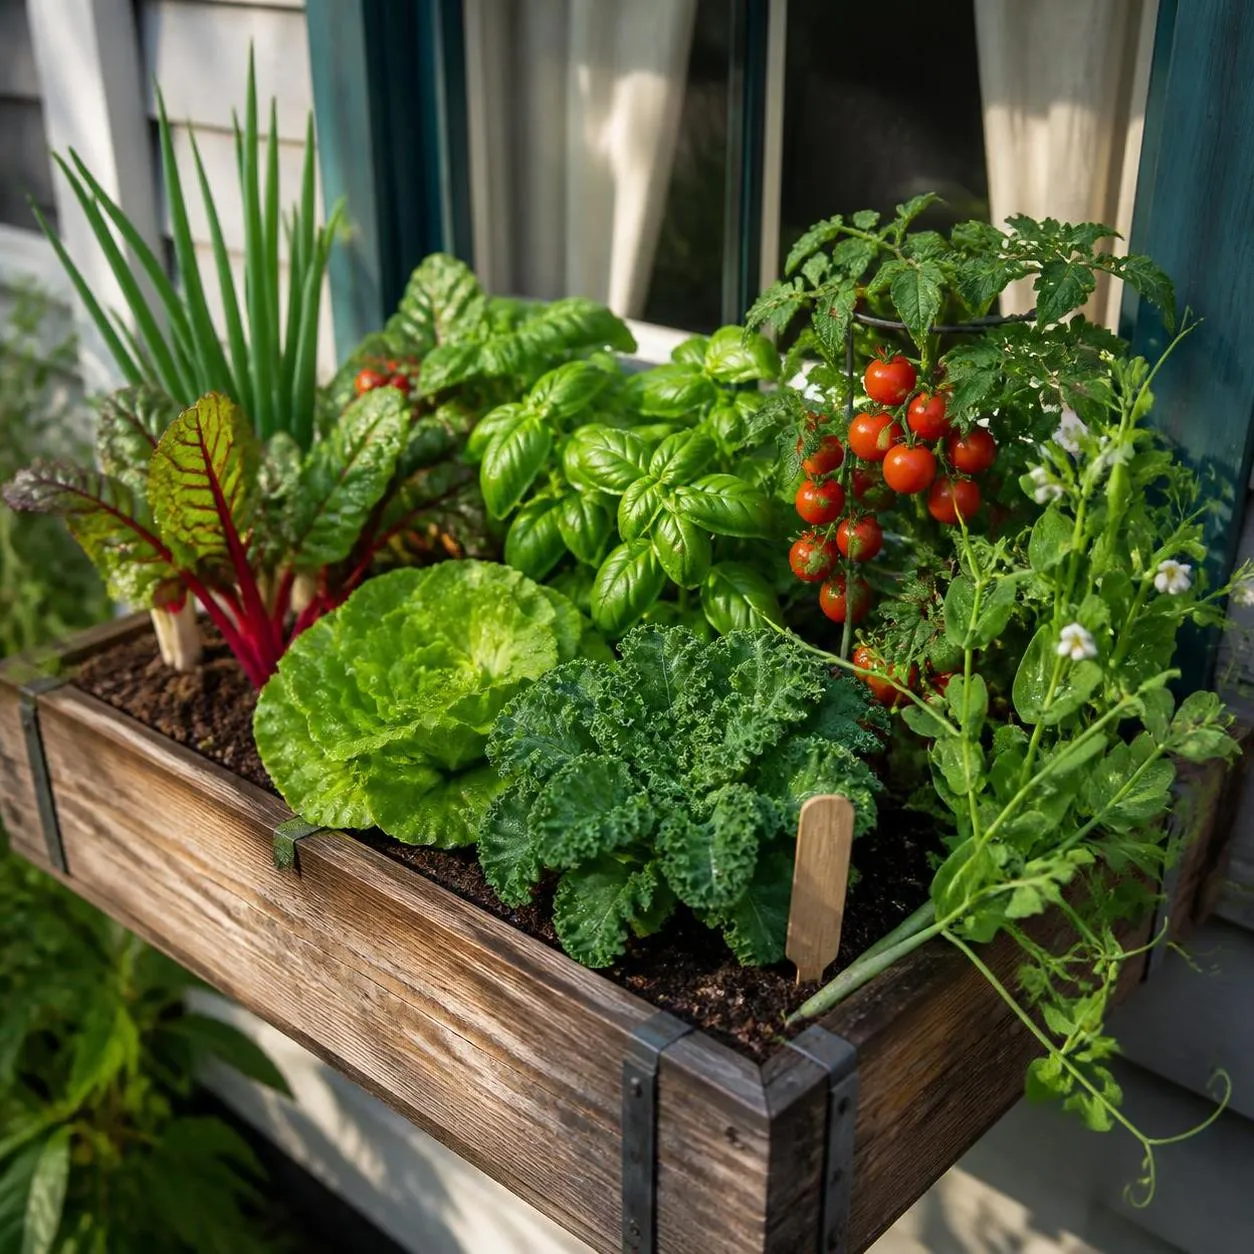
Difficulty: Easy / 1–2 Hours Est. Cost: $30–$80
A deep window box — at least twenty-five centimetres in depth rather than the standard fifteen centimetres of ornamental versions — mounted on the balcony wall or railing grows a genuine range of vegetables that shallow boxes cannot support. The additional depth accommodates root systems that shallow containers deflect, retains moisture between waterings long enough to prevent stress in warm weather, and holds enough growing medium to feed heavy crops through a full season without requiring weekly liquid fertiliser.
Drill drainage holes every fifteen centimetres across the base if the box does not already have them. A box without drainage becomes waterlogged within two or three waterings and roots suffocate from lack of oxygen long before any visible damage appears at the surface. Place a layer of crockery fragments or coarse gravel in the base before filling to prevent the drainage holes from becoming blocked by compacted compost.
Compact courgette varieties, dwarf French beans, cherry tomatoes, chillies, peppers, and lettuces all perform well in a deep window box in a sunny position. Choose genuinely compact or patio varieties rather than standard garden varieties that will outgrow the container within weeks — most seed suppliers now offer balcony-specific versions of popular crops bred specifically for container growing in limited spaces.
Mounting tip: Check the weight rating of any wall-mounted bracket before loading it with a filled box. A large deep window box filled with wet compost and a mature courgette plant can weigh fifteen to twenty kilograms — a weight that standard ornamental brackets are not designed to support. Use heavy-duty brackets rated for at least twice the expected filled weight.
4. Grow Bag Tomato and Pepper Setup
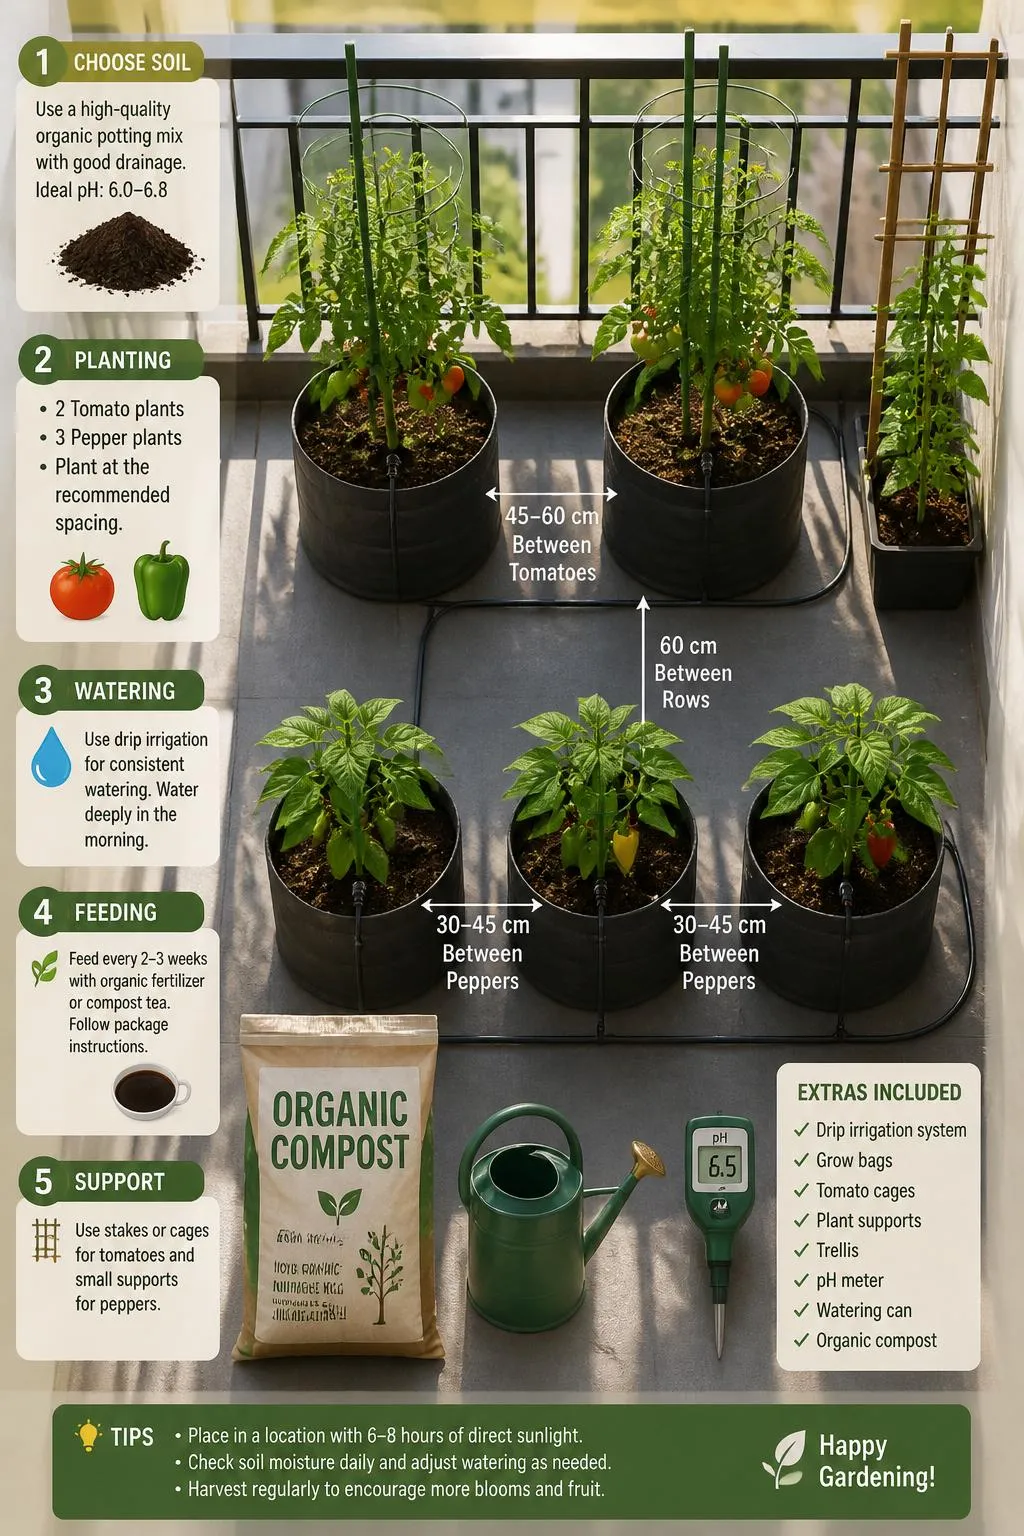
Difficulty: Easy / 30 Minutes Est. Cost: $20–$50
A pair of standard grow bags laid flat on the balcony floor and planted with one or two tomato or pepper plants each is the most cost-effective way to grow these crops in a container garden. The grow bag's shallow, wide form warms up quickly in spring sun, its large surface area allows multiple plants to share the same volume of growing medium, and the polythene exterior retains moisture between waterings more effectively than a porous container.
Cut three planting holes in the top face of each bag — one central hole and one at each end — rather than a single large opening. The three separate holes restrict the surface area through which moisture evaporates and keep the growing medium from drying out as rapidly as a fully open bag. Plant one tomato or pepper through the central hole and use the two end holes for basil, which benefits both from the proximity to the tomato plant and from the warmth radiating off the polythene surface.
Support tomato plants from the moment of planting rather than waiting until they need it. A bamboo cane inserted through each planting hole before the roots establish causes no root disturbance and is in position before the plant reaches the height where a late-added cane would need to be pushed through established root territory. Tie the main stem loosely to the cane every twenty centimetres as growth progresses.
Reuse tip: At the end of the tomato season, empty the grow bag, break up the spent growing medium, and mix it with an equal volume of fresh compost. The refreshed mix is suitable for a second season of less demanding crops — salad leaves, herbs, or radishes — giving the bag a productive second year before it is retired.
5. Hanging Basket Tomato Planter
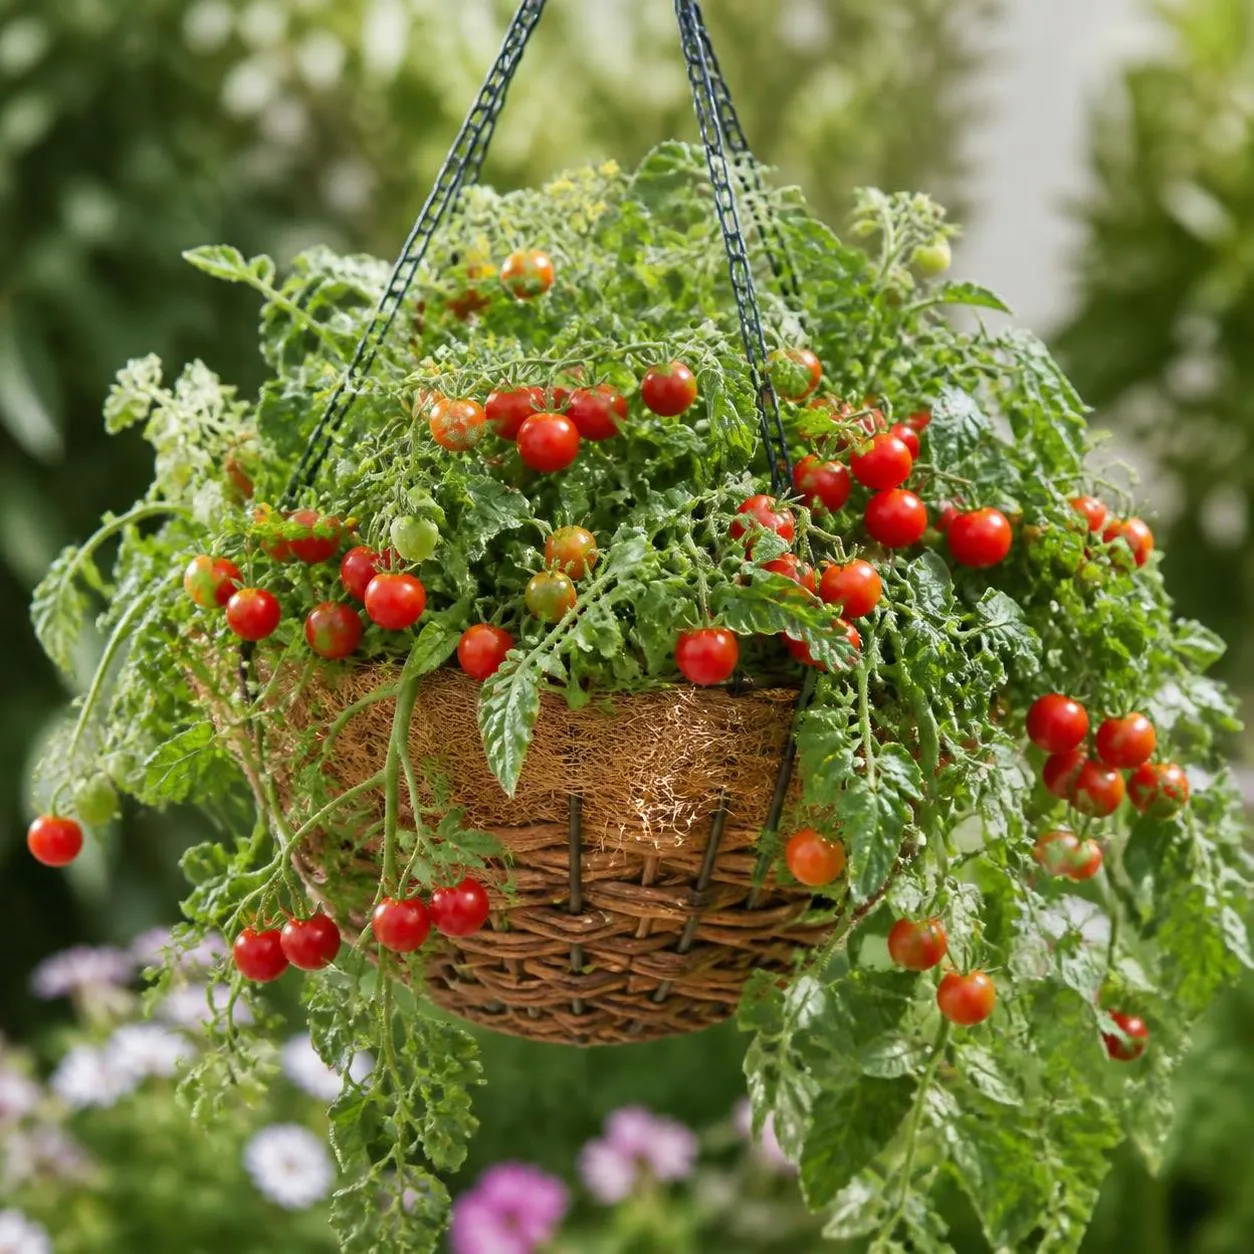
Difficulty: Easy / 30 Minutes Est. Cost: $20–$50
Trailing cherry tomato varieties — bred specifically to cascade downward over the edge of a hanging basket — grow from a ceiling hook or balcony bracket without occupying any floor or railing space. The basket hangs in the air and the plant grows downward out of it, fruiting prolifically along the trailing stems throughout the summer and early autumn.
Choose varieties specifically described as trailing, tumbling, or cascading — Tumbling Tom, Hundreds and Thousands, and Losetto are among the most consistently productive trailing types for container growing. Standard indeterminate tomato varieties will not perform in a hanging basket regardless of how well they are managed — they grow upward and require staking, which is the opposite of the hanging basket's function.
Line the basket with a thick layer of coconut coir — significantly more moisture-retentive than traditional moss — and fill with a premium peat-free tomato compost with added slow-release fertiliser granules pressed into the mix before planting. The slow-release granules feed the plant for sixteen weeks without requiring weekly liquid feeding, which simplifies the management considerably in a busy growing season.
Water hanging basket tomatoes daily in warm weather without exception. The combination of a small growing medium volume, full sun exposure, and the energetic fruiting of a well-established tomato plant creates a daily water demand that no amount of compost quality compensates for if the watering is skipped.
Feeding note: Begin weekly liquid tomato feed when the first flower truss opens — typically four to six weeks after planting out. Slow-release granules provide the background nutrition but cannot deliver the intensive potassium boost that a developing crop of fruits requires from flowering onward.
6. Self-Watering Container Garden
Difficulty: Easy / 1–2 Hours Est. Cost: $60–$180
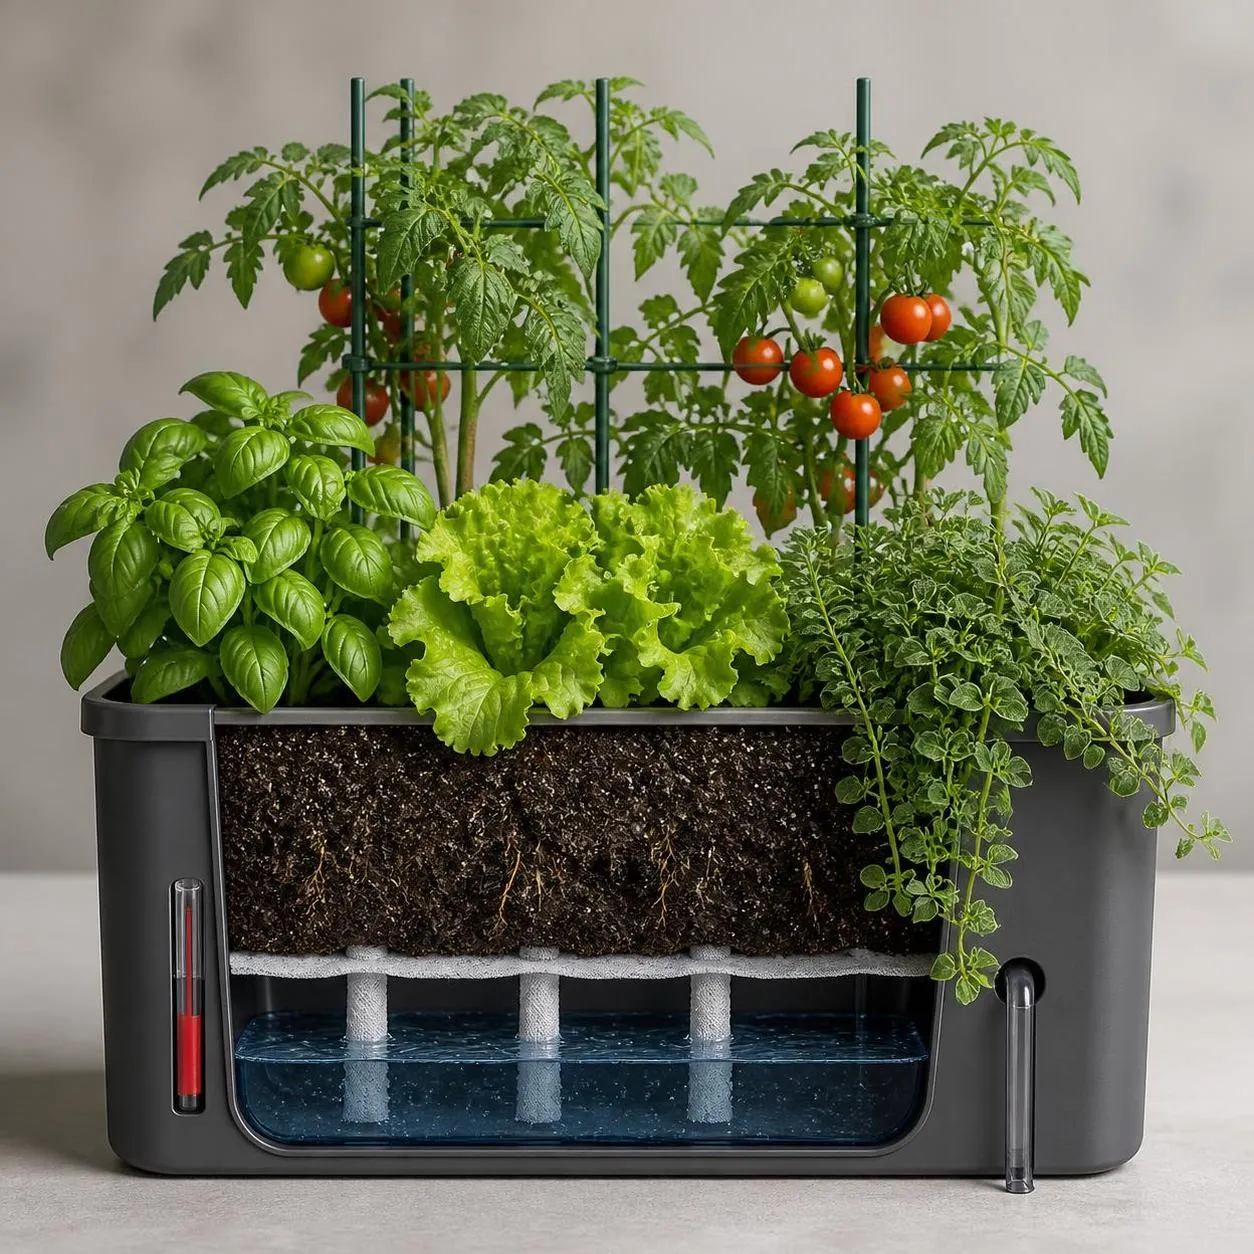
Self-watering containers — planters with an integrated water reservoir in the base from which the growing medium draws moisture upward through capillary action — are the single most practical container choice for balcony vegetable growing because they reduce watering frequency by up to seventy percent without reducing plant performance. For apartment gardeners who travel regularly or work long hours, the buffer provided by the reservoir is the difference between a thriving garden and a dead one.
The reservoir sits below a perforated platform on which the growing medium rests. Roots grow downward through the platform into the reservoir zone where moisture is consistently available rather than dependent on the surface being watered. The plants regulate their own water uptake rather than being subject to the feast-and-famine cycle that manual watering often creates.
Fill self-watering containers with a peat-free compost enriched with water-retentive gel crystals throughout the mix rather than only in the reservoir zone. The gel crystals absorb hundreds of times their own weight in water and release it slowly as the surrounding medium dries, creating an additional moisture buffer at every level of the container rather than only at the base.
Tomatoes, peppers, lettuces, spinach, and herbs all perform exceptionally well in self-watering containers because their roots access moisture consistently and the plant never experiences the stress that triggers bolting, fruit splitting, or premature senescence. The reliability of performance is what makes these containers worth their typically higher purchase price compared to standard pots.
Top-filling note: Always fill the reservoir through the side filling tube rather than watering from the top once plants are established. Top watering bypasses the system's function and encourages shallow surface rooting rather than the deep reservoir-seeking roots that make the self-watering system effective.
7. Tiered Plant Stand Vegetable Garden
Difficulty: Easy / 30 Minutes Assembly Est. Cost: $50–$150
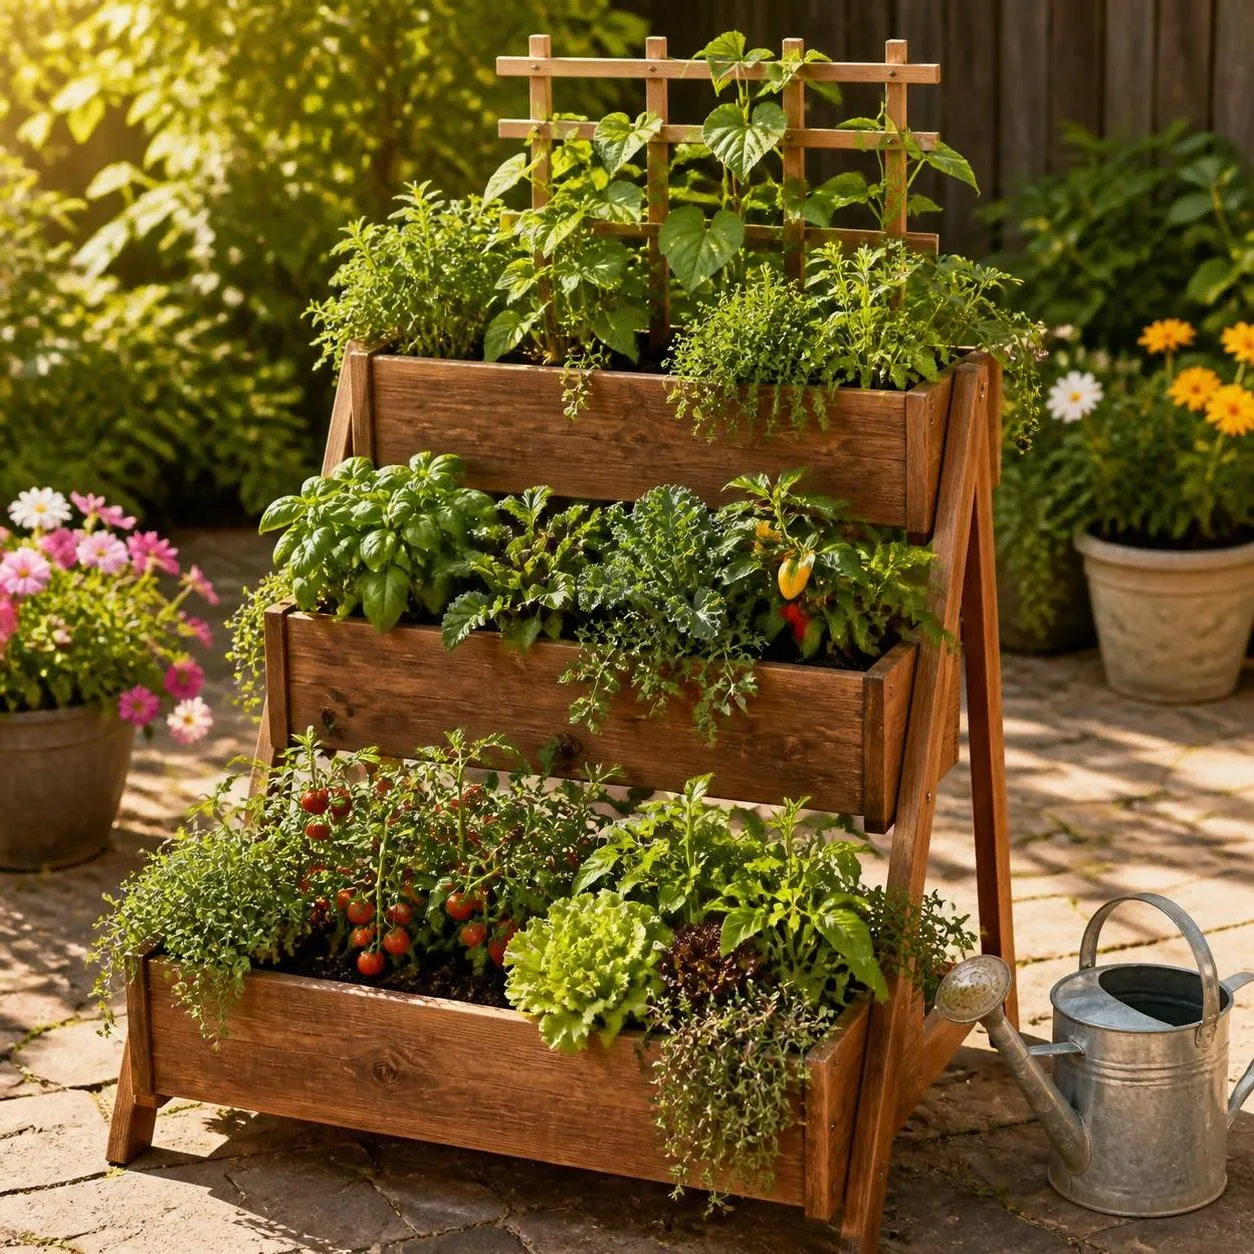
A tiered plant stand — three or four stepped shelves on a freestanding metal or timber frame — holds multiple containers at different heights in a single compact footprint, creating a layered vegetable garden from a floor area no larger than a single large pot. The stepped shelves ensure every container receives sun exposure from the correct angle rather than the lower containers being shaded by those above.
Position the tallest containers on the lowest, widest shelf — tomatoes, peppers, and tall herbs like basil and lemon verbena need the most vertical space and benefit from being at the widest, most stable level of the stand. Medium-height crops like compact lettuces and chillies occupy the middle shelves. The highest, narrowest shelf holds the smallest containers — individual herb pots, a pot of microgreens, or small edible flower plants that require minimal volume but benefit from the elevated position.
Choose a stand with shelf spacing generous enough that the tallest plant on each level has clearance to grow without crowding the shelf above. Most decorative plant stands are designed for ornamental use with low-growing plants — measure the expected mature height of each planned crop and confirm it fits within the tier spacing before purchasing.
Place a large drip tray beneath the entire stand to catch drainage water from every level simultaneously. On a balcony, drainage water from upper levels splashes onto lower levels and eventually onto the balcony floor where it can drain through gaps or collect in ways that cause problems for the floor below. A single large tray under the stand manages all drainage cleanly and prevents any issues with neighbors below.
Stability tip: On an exposed balcony, secure the stand to the wall or railing with a simple bungee cord or a cable tie on windy days. An empty or lightly planted stand is stable, but a fully planted stand with mature tomato and pepper plants is significantly top-heavy and can tip in a strong gust.
8. Herb Container Wall Grid
Difficulty: Medium / 2–3 Hours Est. Cost: $40–$120
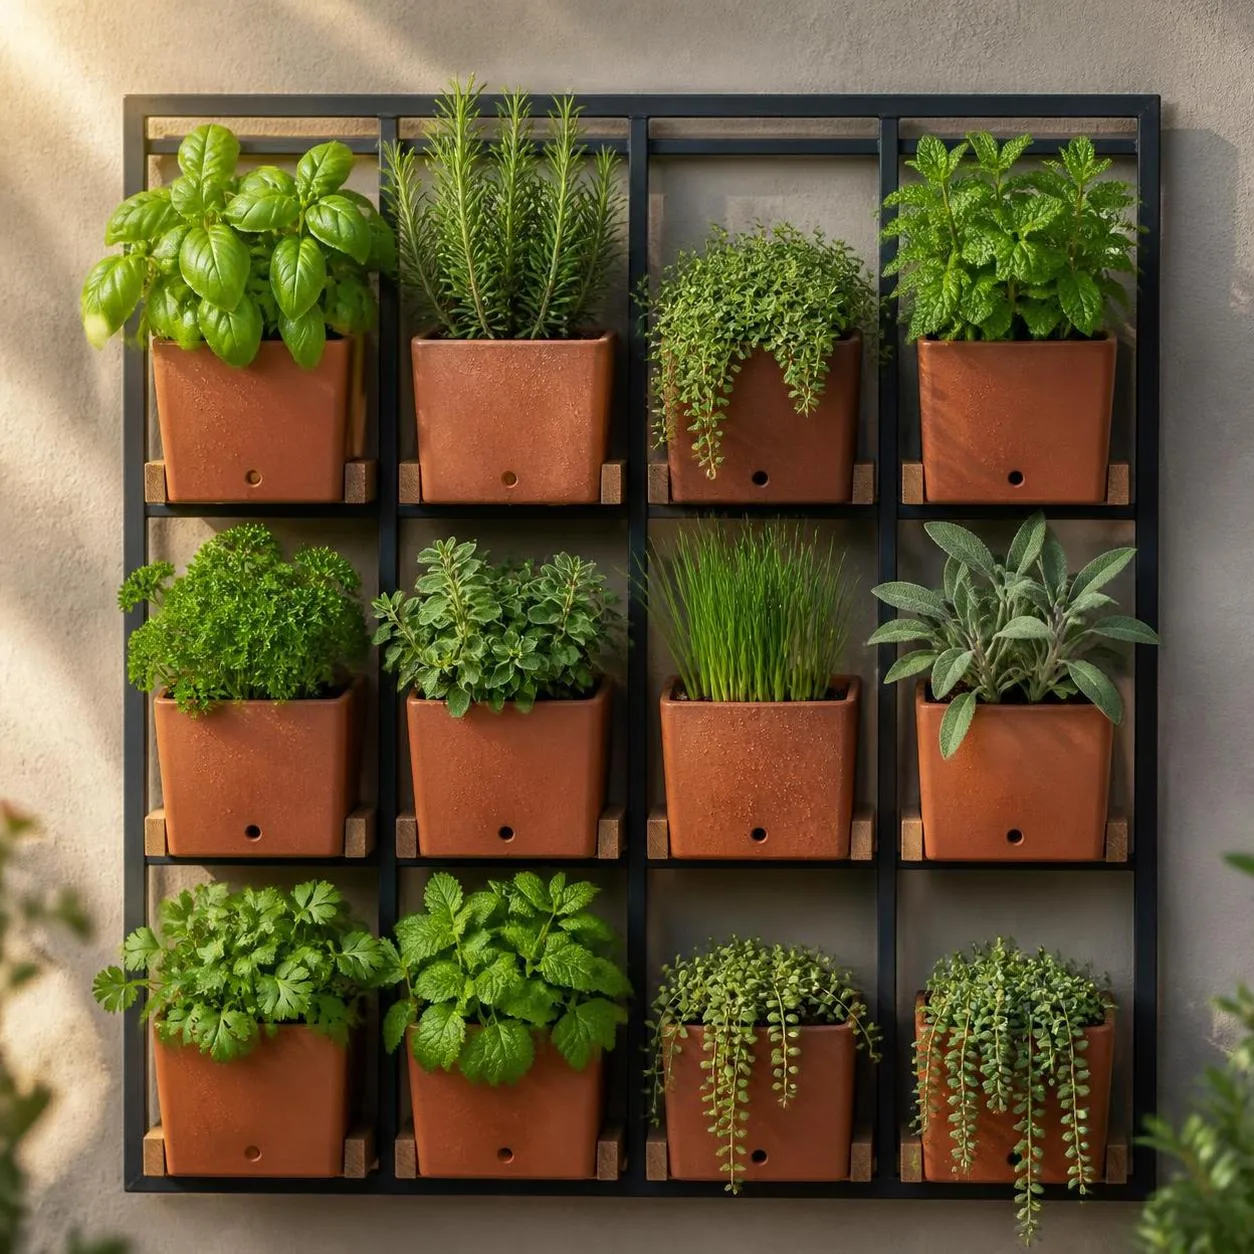
A grid of small individual containers mounted on a wall-mounted rack — either a purpose-made herb wall planter or a DIY grid of S-hooks on a pegboard panel leaned against the balcony wall — turns a blank vertical surface into a productive herb garden that occupies no floor space and is accessible at eye height for daily harvesting.
Use consistent containers throughout the grid — the same size, the same material, the same color — so the wall reads as a designed system rather than a collection of mismatched pots. Small terracotta pots in a uniform grid look deliberate and clean. Matching white ceramic cups hung on S-hooks read as a contemporary installation. The consistency of the container choice is what gives the wall its composed quality regardless of the variety of herbs inside.
Plant each container with a single herb species rather than mixing multiple herbs in one pot. Different herbs have genuinely different water and nutrient requirements — mint needs consistent moisture, rosemary prefers to dry between waterings, and basil needs warmth that cold-loving parsley does not. Separate containers allow each herb to be managed on its own terms rather than at the compromise point between competing requirements.
Harvest from every container weekly regardless of whether the quantity is needed immediately. Regular harvesting stimulates each herb to produce fresh growth continuously, which keeps the plants compact, prevents them from flowering and going to seed prematurely, and means the wall is always full and lush rather than developing bare woody stems at the base.
Indoor extension tip: In autumn, bring the two or three most productive herbs inside to a sunny windowsill rather than letting the entire wall decline with the season. Basil, chives, and parsley all continue producing indoors through winter in good window light and provide fresh herbs through the months when the outdoor wall is resting.
9. Microgreens Tray Garden
Difficulty: Easy / 15 Minutes Est. Cost: $15–$40
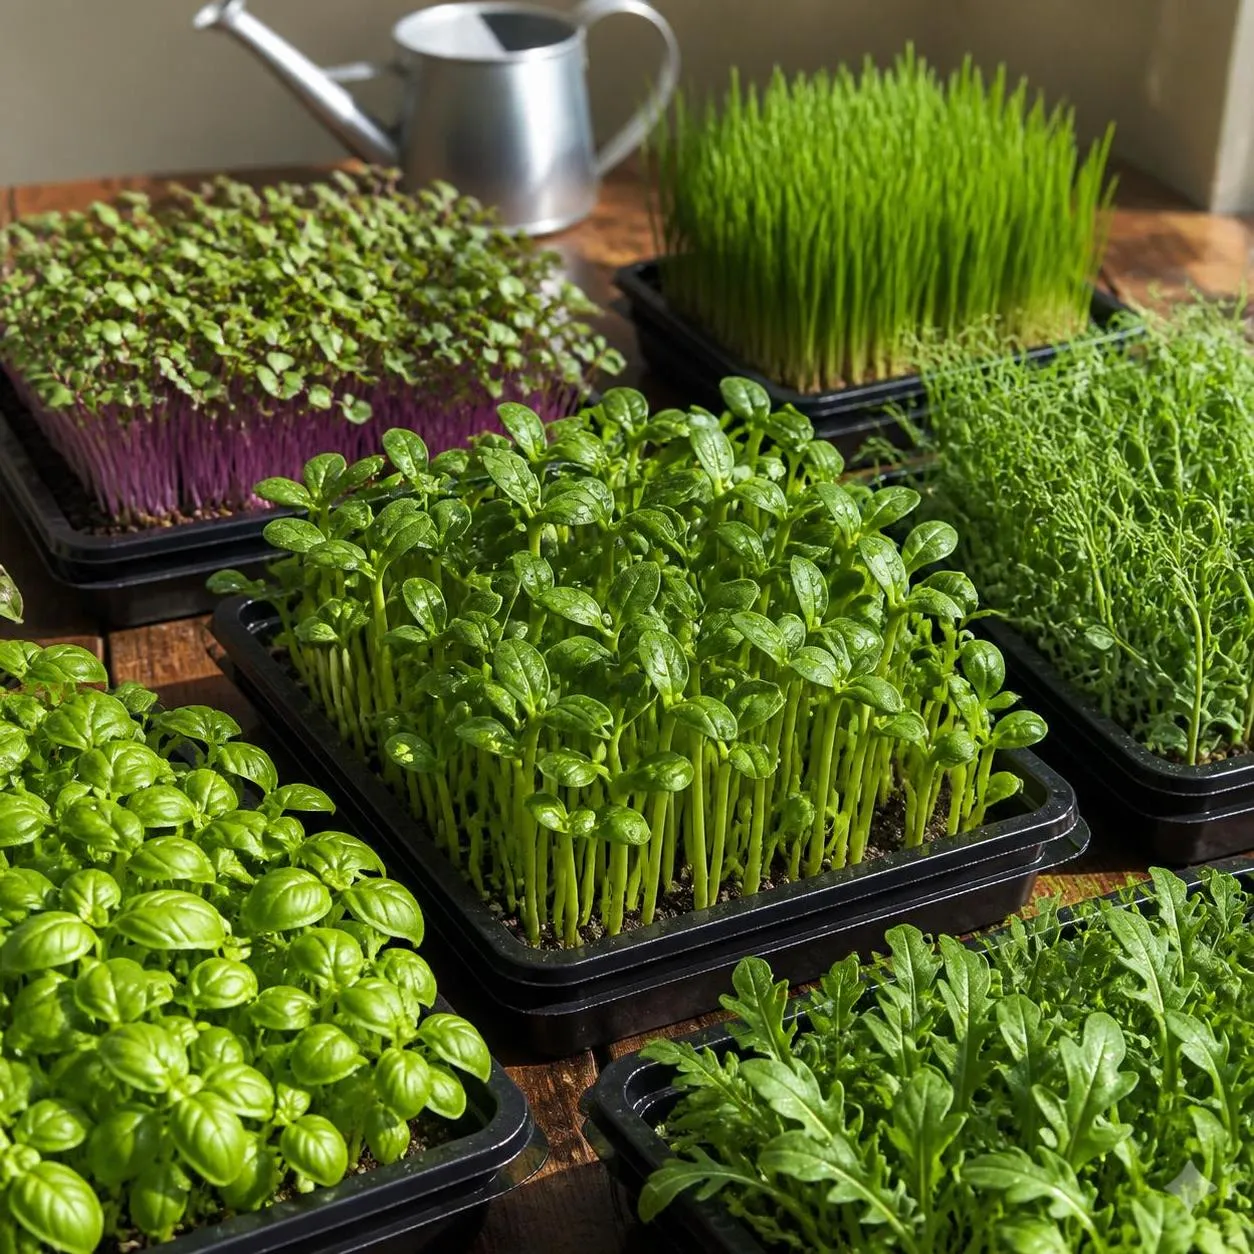
Microgreens — vegetable and herb seedlings harvested at the first true leaf stage, one to three weeks after germination — produce the highest nutritional density and the fastest return of any food crop available to a balcony gardener. A single standard seed tray of sunflower microgreens harvested at ten days provides more vitamins C, E, and beta-carotene per gram than a fully mature sunflower plant and requires no outdoor space whatsoever — a sunny windowsill or a balcony table in any weather above freezing is sufficient.
Fill seed trays with a thin layer of peat-free compost — two to three centimetres is adequate for the brief growing period — and sow densely, covering the entire surface of the tray with seed rather than spacing them at the intervals used for full-grown crops. Press the seed gently into the surface and cover with a piece of cardboard or a second tray to create darkness for the first two to three days of germination. Once the seedlings push the covering upward, move the tray to full light and harvest when the first true leaves appear.
Stagger multiple trays by three to four days so a fresh tray reaches harvest stage every few days rather than everything maturing simultaneously. A rotation of five trays sown four days apart provides continuous harvest with no gap between crops. The entire rotation occupies less space than a single standard plant pot.
Sunflower, pea, radish, broccoli, coriander, and amaranth are among the most productive and flavourful microgreens for a beginner — each has a distinct flavor profile that suits different dishes and each germinates reliably in the cool, variable conditions of a spring or autumn balcony.
Cost tip: Buy microgreen seeds in bulk from a specialist supplier rather than in small packets from a supermarket. Microgreens are sown at very high density and small packets are exhausted within two or three sowings. Bulk quantities cost a fraction of the per-gram price of small packets and last an entire season of continuous production.
10. Multi-Crop Container Kitchen Garden Layout
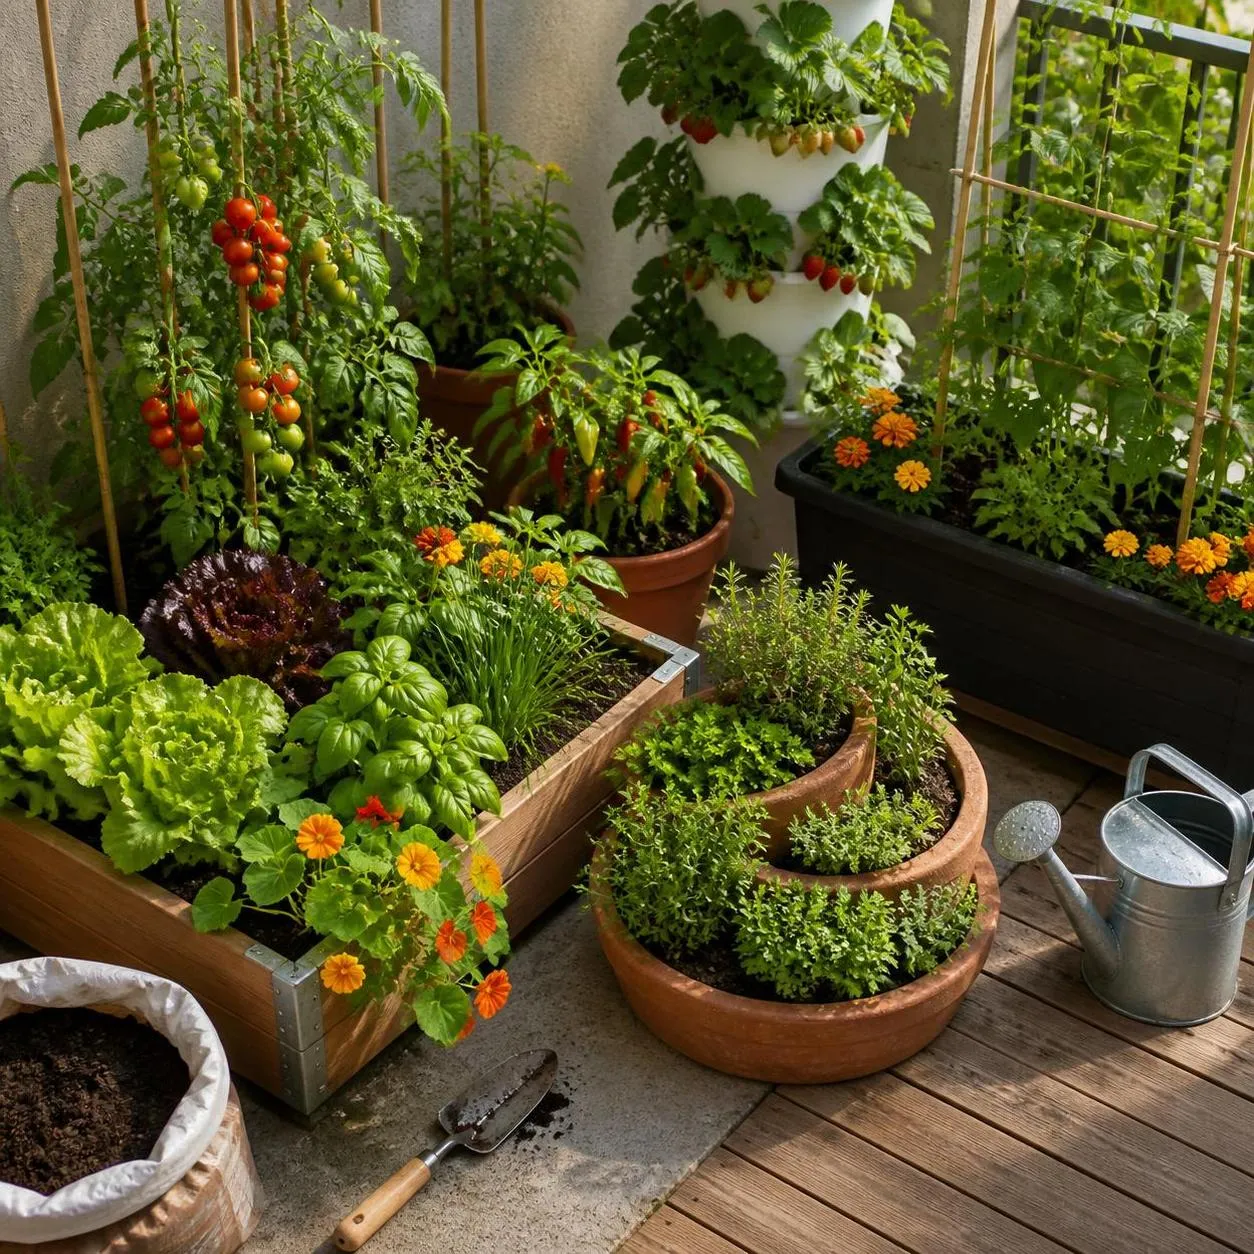
Difficulty: Medium / 1 Day Planning and Setup Est. Cost: $100–$300
A balcony kitchen garden planned as a complete system — with each container assigned a specific role, each crop chosen for its contribution to the household's actual food use, and the layout designed around access and sunlight — produces at a level that individual containers placed without a system never achieve. The planning is the most important part of a container kitchen garden and costs nothing but time.
Begin with a scale sketch of the balcony on paper, marking the sun path across the space at different times of day and noting any permanent shade zones created by the overhead floor, the walls, or nearby structures. Assign the sunniest positions to the crops that need the most light — tomatoes, peppers, and cucumbers require a minimum of six hours of direct sun to produce fruit reliably. Shadier positions receive salad crops and herbs that tolerate lower light levels without significant yield reduction.
Group the containers into functional zones rather than distributing them evenly across the balcony. A cooking zone of the five or six most frequently used herbs positioned nearest the balcony door makes daily harvesting a twenty-second task rather than a deliberate trip to the far end of the space. The fruit and vegetable containers occupy the sunny zone in the primary growing positions. Decorative edibles — nasturtiums, borage, edible violas — fill the gaps between productive containers and add color and pollinator attraction to the system.
Reassess the layout every season rather than treating the first arrangement as fixed. The sun angle changes between spring and summer, what produced well in one position may perform better in another the following year, and the household's food preferences change in ways that the initial planting plan cannot anticipate. A kitchen garden that evolves year by year based on observation and experience becomes progressively more productive and more satisfying with each growing season.
Final note: The most productive balcony kitchen garden is the one that matches the time available to maintain it. Five containers managed attentively through daily watering, weekly feeding, and regular harvesting will always outperform twenty containers managed sporadically. Start smaller than feels necessary, master the management of that scale, and expand from a position of confidence rather than optimism.